
diff options
| author | Daniel Baumann <daniel.baumann@progress-linux.org> | 2024-04-19 02:57:58 +0000 |
|---|---|---|
| committer | Daniel Baumann <daniel.baumann@progress-linux.org> | 2024-04-19 02:57:58 +0000 |
| commit | be1c7e50e1e8809ea56f2c9d472eccd8ffd73a97 (patch) | |
| tree | 9754ff1ca740f6346cf8483ec915d4054bc5da2d /packaging/installer/methods | |
| parent | Initial commit. (diff) | |
| download | netdata-be1c7e50e1e8809ea56f2c9d472eccd8ffd73a97.tar.xz netdata-be1c7e50e1e8809ea56f2c9d472eccd8ffd73a97.zip | |
Adding upstream version 1.44.3.upstream/1.44.3upstream
Signed-off-by: Daniel Baumann <daniel.baumann@progress-linux.org>
Diffstat (limited to 'packaging/installer/methods')
| -rw-r--r-- | packaging/installer/methods/ansible.md | 156 | ||||
| -rw-r--r-- | packaging/installer/methods/aws.md | 67 | ||||
| -rw-r--r-- | packaging/installer/methods/azure.md | 68 | ||||
| -rw-r--r-- | packaging/installer/methods/freebsd.md | 148 | ||||
| -rw-r--r-- | packaging/installer/methods/gcp.md | 70 | ||||
| -rw-r--r-- | packaging/installer/methods/kickstart.md | 237 | ||||
| -rw-r--r-- | packaging/installer/methods/kubernetes.md | 200 | ||||
| -rw-r--r-- | packaging/installer/methods/macos.md | 118 | ||||
| -rw-r--r-- | packaging/installer/methods/manual.md | 248 | ||||
| -rw-r--r-- | packaging/installer/methods/methods.md | 26 | ||||
| -rw-r--r-- | packaging/installer/methods/offline.md | 59 | ||||
| -rw-r--r-- | packaging/installer/methods/packages.md | 151 | ||||
| -rw-r--r-- | packaging/installer/methods/pfsense.md | 87 | ||||
| -rw-r--r-- | packaging/installer/methods/source.md | 244 | ||||
| -rw-r--r-- | packaging/installer/methods/synology.md | 64 | ||||
| -rw-r--r-- | packaging/installer/methods/systems.md | 18 |
16 files changed, 1961 insertions, 0 deletions
diff --git a/packaging/installer/methods/ansible.md b/packaging/installer/methods/ansible.md new file mode 100644 index 00000000..6ce4e8f0 --- /dev/null +++ b/packaging/installer/methods/ansible.md @@ -0,0 +1,156 @@ +<!-- +title: "Deploy Netdata with Ansible" +description: "Deploy an infrastructure monitoring solution in minutes with the Netdata Agent and Ansible. Use and customize a simple playbook for monitoring as code." +image: /img/seo/guides/deploy/ansible.png +custom_edit_url: https://github.com/netdata/netdata/edit/master/packaging/installer/methods/ansible.md +sidebar_label: "Ansible" +learn_status: "Published" +learn_rel_path: "Installation/Install on specific environments" +--> + +# Deploy Netdata with Ansible + +Netdata's [one-line kickstart](https://github.com/netdata/netdata/blob/master/packaging/installer/README.md#install-on-linux-with-one-line-installer) is zero-configuration, highly adaptable, and compatible with tons +of different operating systems and Linux distributions. You can use it on bare metal, VMs, containers, and everything +in-between. + +But what if you're trying to bootstrap an infrastructure monitoring solution as quickly as possible? What if you need to +deploy Netdata across an entire infrastructure with many nodes? What if you want to make this deployment reliable, +repeatable, and idempotent? What if you want to write and deploy your infrastructure or cloud monitoring system like +code? + +Enter [Ansible](https://ansible.com), a popular system provisioning, configuration management, and infrastructure as +code (IaC) tool. Ansible uses **playbooks** to glue many standardized operations together with a simple syntax, then run +those operations over standard and secure SSH connections. There's no agent to install on the remote system, so all you +have to worry about is your application and your monitoring software. + +Ansible has some competition from the likes of [Puppet](https://puppet.com/) or [Chef](https://www.chef.io/), but the +most valuable feature about Ansible is **idempotent**. From the [Ansible +glossary](https://docs.ansible.com/ansible/latest/reference_appendices/glossary.html) + +> An operation is idempotent if the result of performing it once is exactly the same as the result of performing it +> repeatedly without any intervening actions. + +Idempotency means you can run an Ansible playbook against your nodes any number of times without affecting how they +operate. When you deploy Netdata with Ansible, you're also deploying _monitoring as code_. + +In this guide, we'll walk through the process of using an [Ansible +playbook](https://github.com/netdata/community/tree/main/configuration-management/ansible-quickstart/) to automatically +deploy the Netdata Agent to any number of distributed nodes, manage the configuration of each node, and connect them to +your Netdata Cloud account. You'll go from some unmonitored nodes to a infrastructure monitoring solution in a matter of +minutes. + +## Prerequisites + +- A Netdata Cloud account. [Sign in and create one](https://app.netdata.cloud) if you don't have one already. +- An administration system with [Ansible](https://www.ansible.com/) installed. +- One or more nodes that your administration system can access via [SSH public + keys](https://git-scm.com/book/en/v2/Git-on-the-Server-Generating-Your-SSH-Public-Key) (preferably password-less). + +## Download and configure the playbook + +First, download the +[playbook](https://github.com/netdata/community/tree/main/configuration-management/ansible-quickstart/), move it to the +current directory, and remove the rest of the cloned repository, as it's not required for using the Ansible playbook. + +```bash +git clone https://github.com/netdata/community.git +mv community/configuration-management/ansible-quickstart . +rm -rf community +``` + +Or if you don't want to clone the entire repository, use the [gitzip browser extension](https://gitzip.org/) to get the netdata-agent-deployment directory as a zip file. + +Next, `cd` into the Ansible directory. + +```bash +cd ansible-quickstart +``` + +### Edit the `hosts` file + +The `hosts` file contains a list of IP addresses or hostnames that Ansible will try to run the playbook against. The +`hosts` file that comes with the repository contains two example IP addresses, which you should replace according to the +IP address/hostname of your nodes. + +```conf +203.0.113.0 hostname=node-01 +203.0.113.1 hostname=node-02 +``` + +You can also set the `hostname` variable, which appears both on the local Agent dashboard and Netdata Cloud, or you can +omit the `hostname=` string entirely to use the system's default hostname. + +#### Set the login user (optional) + +If you SSH into your nodes as a user other than `root`, you need to configure `hosts` according to those user names. Use +the `ansible_user` variable to set the login user. For example: + +```conf +203.0.113.0 hostname=ansible-01 ansible_user=example +``` + +#### Set your SSH key (optional) + +If you use an SSH key other than `~/.ssh/id_rsa` for logging into your nodes, you can set that on a per-node basis in +the `hosts` file with the `ansible_ssh_private_key_file` variable. For example, to log into a Lightsail instance using +two different SSH keys supplied by AWS. + +```conf +203.0.113.0 hostname=ansible-01 ansible_ssh_private_key_file=~/.ssh/LightsailDefaultKey-us-west-2.pem +203.0.113.1 hostname=ansible-02 ansible_ssh_private_key_file=~/.ssh/LightsailDefaultKey-us-east-1.pem +``` + +### Edit the `vars/main.yml` file + +In order to connect your node(s) to your Space in Netdata Cloud, and see all their metrics in real-time in [composite +charts](https://github.com/netdata/netdata/blob/master/docs/visualize/overview-infrastructure.md) or perform [Metric +Correlations](https://github.com/netdata/netdata/blob/master/docs/cloud/insights/metric-correlations.md), you need to set the `claim_token` +and `claim_room` variables. + +To find your `claim_token` and `claim_room`, go to Netdata Cloud, then click on your Space's name in the top navigation, +then click on **Manage your Space**. Click on the **Nodes** tab in the panel that appears, which displays a script with +`token` and `room` strings. + + + +Copy those strings into the `claim_token` and `claim_rooms` variables. + +```yml +claim_token: XXXXX +claim_rooms: XXXXX +``` + +Change the `dbengine_multihost_disk_space` if you want to change the metrics retention policy by allocating more or less +disk space for storing metrics. The default is 2048 Mib, or 2 GiB. + +Because we're connecting this node to Netdata Cloud, and will view its dashboards there instead of via the IP address or +hostname of the node, the playbook disables that local dashboard by setting `web_mode` to `none`. This gives a small +security boost by not allowing any unwanted access to the local dashboard. + +You can read more about this decision, or other ways you might lock down the local dashboard, in our [node security +doc](https://github.com/netdata/netdata/blob/master/docs/netdata-security.md). + +> Curious about why Netdata's dashboard is open by default? Read our [blog +> post](https://www.netdata.cloud/blog/netdata-agent-dashboard/) on that zero-configuration design decision. + +## Run the playbook + +Time to run the playbook from your administration system: + +```bash +ansible-playbook -i hosts tasks/main.yml +``` + +Ansible first connects to your node(s) via SSH, then [collects +facts](https://docs.ansible.com/ansible/latest/user_guide/playbooks_vars_facts.html#ansible-facts) about the system. +This playbook doesn't use these facts, but you could expand it to provision specific types of systems based on the +makeup of your infrastructure. + +Next, Ansible makes changes to each node according to the `tasks` defined in the playbook, and +[returns](https://docs.ansible.com/ansible/latest/reference_appendices/common_return_values.html#changed) whether each +task results in a changed, failure, or was skipped entirely. + +The task to install Netdata will take a few minutes per node, so be patient! Once the playbook reaches the connect to Cloud +task, your nodes start populating your Space in Netdata Cloud. diff --git a/packaging/installer/methods/aws.md b/packaging/installer/methods/aws.md new file mode 100644 index 00000000..c0b92a03 --- /dev/null +++ b/packaging/installer/methods/aws.md @@ -0,0 +1,67 @@ +<!-- +title: "Install Netdata on AWS" +description: "The Netdata Agent runs on all popular cloud providers, but often requires additional steps and configuration for full functionality." +custom_edit_url: https://github.com/netdata/netdata/edit/master/packaging/installer/methods/aws.md +sidebar_label: "AWS" +learn_status: "Published" +learn_rel_path: "Installation/Install on specific environments" +--> + +# Install Netdata on AWS + +Netdata is fully compatible with Amazon Web Services (AWS). +You can install Netdata on cloud instances to monitor the apps/services running there, or use +multiple instances in a [parent-child streaming](https://github.com/netdata/netdata/blob/master/streaming/README.md) configuration. + +## Recommended installation method + +The best installation method depends on the instance's operating system, distribution, and version. For Linux instances, +we recommend the [`kickstart.sh` automatic installation script](https://github.com/netdata/netdata/blob/master/packaging/installer/methods/kickstart.md). + +If you have issues with Netdata after installation, look to the sections below to find the issue you're experiencing, +followed by the solution for your provider. + +## Post-installation configuration + +### Add a firewall rule to access Netdata's dashboard + +If you cannot access Netdata's dashboard on your cloud instance via `http://HOST:19999`, and instead get an error page +from your browser that says, "This site can't be reached" (Chrome) or "Unable to connect" (Firefox), you may need to +configure your cloud provider's firewall. + +Cloud providers often create network-level firewalls that run separately from the instance itself. Both AWS and Google +Cloud Platform calls them Virtual Private Cloud (VPC) networks. These firewalls can apply even if you've disabled +firewalls on the instance itself. Because you can modify these firewalls only via the cloud provider's web interface, +it's easy to overlook them when trying to configure and access Netdata's dashboard. + +You can often confirm a firewall issue by querying the dashboard while connected to the instance via SSH: `curl +http://localhost:19999/api/v1/info`. If you see JSON output, Netdata is running properly. If you try the same `curl` +command from a remote system, and it fails, it's likely that a firewall is blocking your requests. + +Another option is to put Netdata behind web server, which will proxy requests through standard HTTP/HTTPS ports +(80/443), which are likely already open on your instance. We have a number of guides available: + +- [Apache](https://github.com/netdata/netdata/blob/master/docs/Running-behind-apache.md) +- [Nginx](https://github.com/netdata/netdata/blob/master/docs/Running-behind-nginx.md) +- [Caddy](https://github.com/netdata/netdata/blob/master/docs/Running-behind-caddy.md) +- [HAProxy](https://github.com/netdata/netdata/blob/master/docs/Running-behind-haproxy.md) +- [lighttpd](https://github.com/netdata/netdata/blob/master/docs/Running-behind-lighttpd.md) + +Sign in to the [AWS console](https://console.aws.amazon.com/) and navigate to the EC2 dashboard. Click on the **Security +Groups** link in the navigation, beneath the **Network & Security** heading. Find the Security Group your instance +belongs to, and either right-click on it or click the **Actions** button above to see a dropdown menu with **Edit +inbound rules**. + +Add a new rule with the following options: + +```conf +Type: Custom TCP +Protocol: TCP +Port Range: 19999 +Source: Anywhere +Description: Netdata +``` + +You can also choose **My IP** as the source if you prefer. + +Click **Save** to apply your new inbound firewall rule. diff --git a/packaging/installer/methods/azure.md b/packaging/installer/methods/azure.md new file mode 100644 index 00000000..4c39a00a --- /dev/null +++ b/packaging/installer/methods/azure.md @@ -0,0 +1,68 @@ +<!-- +title: "Install Netdata on Azure" +description: "The Netdata Agent runs on all popular cloud providers, but often requires additional steps and configuration for full functionality." +custom_edit_url: https://github.com/netdata/netdata/edit/master/packaging/installer/methods/azure.md +sidebar_label: "Azure" +learn_status: "Published" +learn_rel_path: "Installation/Install on specific environments" +--> + +# Install Netdata on Azure + +Netdata is fully compatible with Azure. +You can install Netdata on cloud instances to monitor the apps/services running there, or use +multiple instances in a [parent-child streaming](https://github.com/netdata/netdata/blob/master/streaming/README.md) configuration. + +## Recommended installation method + +The best installation method depends on the instance's operating system, distribution, and version. For Linux instances, +we recommend the [`kickstart.sh` automatic installation script](https://github.com/netdata/netdata/blob/master/packaging/installer/methods/kickstart.md). + +If you have issues with Netdata after installation, look to the sections below to find the issue you're experiencing, +followed by the solution for your provider. + +## Post-installation configuration + +### Add a firewall rule to access Netdata's dashboard + +If you cannot access Netdata's dashboard on your cloud instance via `http://HOST:19999`, and instead get an error page +from your browser that says, "This site can't be reached" (Chrome) or "Unable to connect" (Firefox), you may need to +configure your cloud provider's firewall. + +Cloud providers often create network-level firewalls that run separately from the instance itself. Both AWS and Google +Cloud Platform calls them Virtual Private Cloud (VPC) networks. These firewalls can apply even if you've disabled +firewalls on the instance itself. Because you can modify these firewalls only via the cloud provider's web interface, +it's easy to overlook them when trying to configure and access Netdata's dashboard. + +You can often confirm a firewall issue by querying the dashboard while connected to the instance via SSH: `curl +http://localhost:19999/api/v1/info`. If you see JSON output, Netdata is running properly. If you try the same `curl` +command from a remote system, and it fails, it's likely that a firewall is blocking your requests. + +Another option is to put Netdata behind web server, which will proxy requests through standard HTTP/HTTPS ports +(80/443), which are likely already open on your instance. We have a number of guides available: + +- [Apache](https://github.com/netdata/netdata/blob/master/docs/Running-behind-apache.md) +- [Nginx](https://github.com/netdata/netdata/blob/master/docs/Running-behind-nginx.md) +- [Caddy](https://github.com/netdata/netdata/blob/master/docs/Running-behind-caddy.md) +- [HAProxy](https://github.com/netdata/netdata/blob/master/docs/Running-behind-haproxy.md) +- [lighttpd](https://github.com/netdata/netdata/blob/master/docs/Running-behind-lighttpd.md) + +Sign in to the [Azure portal](https://portal.azure.com) and open the virtual machine running Netdata. Click on the +**Networking** link beneath the **Settings** header, then click on the **Add inbound security rule** button. + +Add a new rule with the following options: + +```conf +Source: Any +Source port ranges: 19999 +Destination: Any +Destination port ranges: 19999 +Protocol: TCP +Action: Allow +Priority: 310 +Name: Netdata +``` + +Click **Add** to apply your new inbound security rule. + + diff --git a/packaging/installer/methods/freebsd.md b/packaging/installer/methods/freebsd.md new file mode 100644 index 00000000..21670cdc --- /dev/null +++ b/packaging/installer/methods/freebsd.md @@ -0,0 +1,148 @@ +<!-- +title: "Install Netdata on FreeBSD" +description: "Install Netdata on FreeBSD to monitor the health and performance of bare metal or VMs with thousands of real-time, per-second metrics." +custom_edit_url: https://github.com/netdata/netdata/edit/master/packaging/installer/methods/freebsd.md +sidebar_label: "FreeBSD" +learn_status: "Published" +learn_rel_path: "Installation/Install on specific environments" +--> + +# Install Netdata on FreeBSD + +> 💡 This document is maintained by Netdata's community, and may not be completely up-to-date. Please double-check the +> details of the installation process, such as version numbers for downloadable packages, before proceeding. +> +> You can help improve this document by [submitting a +> PR](https://github.com/netdata/netdata/edit/master/packaging/installer/methods/freebsd.md) with your recommended +> improvements or changes. Thank you! + +## Install dependencies + +This step needs root privileges. + +```sh +pkg install bash e2fsprogs-libuuid git curl autoconf automake pkgconf pidof liblz4 libuv json-c cmake gmake +``` + +Please respond in the affirmative for any relevant prompts during the installation process. + +## Install Netdata + +The simplest method is to use the single line [kickstart script](https://learn.netdata.cloud/docs/agent/packaging/installer/methods/kickstart) + +If you have a Netdata cloud account then clicking on the **Connect Nodes** button will generate the kickstart command you should use. Use the command from the "Linux" tab, it should look something like this: + +```sh +wget -O /tmp/netdata-kickstart.sh https://my-netdata.io/kickstart.sh && sh /tmp/netdata-kickstart.sh --claim-token <CLAIM_TOKEN> --claim-url https://app.netdata.cloud +``` +Please respond in the affirmative for any relevant prompts during the installation process. + +Once the installation is completed, you should be able to start monitoring the FreeBSD server using Netdata. + + + +Netdata can also be installed via [FreeBSD ports](https://www.freshports.org/net-mgmt/netdata). + +## Manual installation + +If you would prefer to manually install Netdata, the following steps can help you do this. + +Download Netdata: + +```sh +fetch https://github.com/netdata/netdata/releases/download/v1.36.1/netdata-v1.36.1.tar.gz +``` + +> ⚠️ Verify the latest version by either navigating to [Netdata's latest +> release](https://github.com/netdata/netdata/releases/latest) or using `curl`: +> +> ```bash +> basename $(curl -Ls -o /dev/null -w %{url_effective} https://github.com/netdata/netdata/releases/latest) +> ``` + +Unzip the downloaded file: + +```sh +gunzip netdata*.tar.gz && tar xf netdata*.tar && rm -rf netdata*.tar +``` + +Install Netdata in `/opt/netdata`. If you want to enable automatic updates, add `--auto-update` or `-u` to install `netdata-updater` in `cron` (**need root permission**): + +```sh +cd netdata-v* && ./netdata-installer.sh --install-prefix /opt && cp /opt/netdata/usr/sbin/netdata-claim.sh /usr/sbin/ +``` + +You also need to enable the `netdata` service in `/etc/rc.conf`: + +```sh +sysrc netdata_enable="YES" +``` + +Finally, and very importantly, update Netdata using the script provided by the Netdata team (**need root permission**): + +```sh +cd /opt/netdata/usr/libexec/netdata/ && ./netdata-updater.sh +``` + +You can now access the Netdata dashboard by navigating to `http://NODE:19999`, replacing `NODE` with the IP address or hostname of your system. + + + +Starting with v1.30, Netdata collects anonymous usage information by default and sends it to a self hosted PostHog instance within the Netdata infrastructure. To read +more about the information collected and how to opt-out, check the [anonymous statistics +page](https://github.com/netdata/netdata/blob/master/docs/anonymous-statistics.md). + +## Updating the Agent on FreeBSD +If you have not passed the `--auto-update` or `-u` parameter for the installer to enable automatic updating, repeat the last step to update Netdata whenever a new version becomes available. +The `netdata-updater.sh` script will update your Agent. + +## Optional parameters to alter your installation + +The `kickstart.sh` script accepts a number of optional parameters to control how the installation process works: + +- `--non-interactive`: Don’t prompt for anything and assume yes whenever possible, overriding any automatic detection of an interactive run. +- `--interactive`: Act as if running interactively, even if automatic detection indicates a run is non-interactive. +- `--dont-wait`: Synonym for `--non-interactive` +- `--dry-run`: Show what the installer would do, but don’t actually do any of it. +- `--dont-start-it`: Don’t auto-start the daemon after installing. This parameter is not guaranteed to work. +- `--release-channel`: Specify a particular release channel to install from. Currently supported release channels are: + - `nightly`: Installs a nightly build (this is currently the default). + - `stable`: Installs a stable release. + - `default`: Explicitly request whatever the current default is. +- `--nightly-channel`: Synonym for `--release-channel nightly`. +- `--stable-channel`: Synonym for `--release-channel stable`. +- `--auto-update`: Enable automatic updates (this is the default). +- `--no-updates`: Disable automatic updates. +- `--disable-telemetry`: Disable anonymous statistics. +- `--native-only`: Only install if native binary packages are available. +- `--static-only`: Only install if a static build is available. +- `--build-only`: Only install using a local build. +- `--disable-cloud`: For local builds, don’t build any of the cloud code at all. For native packages and static builds, + use runtime configuration to disable cloud support. +- `--require-cloud`: Only install if Netdata Cloud can be enabled. Overrides `--disable-cloud`. +- `--install-prefix`: Specify an installation prefix for local builds (by default, we use a sane prefix based on the type of system). +- `--install-version`: Specify the version of Netdata to install. +- `--old-install-prefix`: Specify the custom local build's installation prefix that should be removed. +- `--local-build-options`: Specify additional options to pass to the installer code when building locally. Only valid if `--build-only` is also specified. +- `--static-install-options`: Specify additional options to pass to the static installer code. Only valid if --static-only is also specified. + +The following options are mutually exclusive and specifiy special operations other than trying to install Netdata normally or update an existing install: + +- `--reinstall`: If there is an existing install, reinstall it instead of trying to update it. If there is not an existing install, install netdata normally. +- `--reinstall-even-if-unsafe`: If there is an existing install, reinstall it instead of trying to update it, even if doing so is known to potentially break things (for example, if we cannot detect what tyep of installation it is). If there is not an existing install, install Netdata normally. +- `--reinstall-clean`: If there is an existing install, uninstall it before trying to install Netdata. Fails if there is no existing install. +- `--uninstall`: Uninstall an existing installation of Netdata. Fails if there is no existing install. +- `--claim-only`: If there is an existing install, only try to claim it without attempting to update it. If there is no existing install, install and claim Netdata normally. +- `--repositories-only`: Only install repository configuration packages instead of doing a full install of Netdata. Automatically sets --native-only. +- `--prepare-offline-install-source`: Instead of insallling the agent, prepare a directory that can be used to install on another system without needing to download anything. See our [offline installation documentation](https://github.com/netdata/netdata/blob/master/packaging/installer/methods/offline.md) for more info. + +Additionally, the following environment variables may be used to further customize how the script runs (most users +should not need to use special values for any of these): + +- `TMPDIR`: Used to specify where to put temporary files. On most systems, the default we select automatically + should be fine. The user running the script needs to both be able to write files to the temporary directory, + and run files from that location. +- `ROOTCMD`: Used to specify a command to use to run another command with root privileges if needed. By default + we try to use sudo, doas, or pkexec (in that order of preference), but if you need special options for one of + those to work, or have a different tool to do the same thing on your system, you can specify it here. +- `DISABLE_TELEMETRY`: If set to a value other than 0, behave as if `--disable-telemetry` was specified. diff --git a/packaging/installer/methods/gcp.md b/packaging/installer/methods/gcp.md new file mode 100644 index 00000000..0b16b109 --- /dev/null +++ b/packaging/installer/methods/gcp.md @@ -0,0 +1,70 @@ +<!-- +title: "Install Netdata on GCP" +description: "The Netdata Agent runs on all popular cloud providers, but often requires additional steps and configuration for full functionality." +custom_edit_url: https://github.com/netdata/netdata/edit/master/packaging/installer/methods/gcp.md +sidebar_label: "GCP" +learn_status: "Published" +learn_topic_type: "Tasks" +learn_rel_path: "Installation/Install on specific environments" +--> + +# Install Netdata on GCP + +Netdata is fully compatible with the Google Cloud Platform (GCP). +You can install Netdata on cloud instances to monitor the apps/services running there, or use +multiple instances in a [parent-child streaming](https://github.com/netdata/netdata/blob/master/streaming/README.md) configuration. + +## Recommended installation method + +The best installation method depends on the instance's operating system, distribution, and version. For Linux instances, +we recommend the [`kickstart.sh` automatic installation script](https://github.com/netdata/netdata/blob/master/packaging/installer/methods/kickstart.md). + +If you have issues with Netdata after installation, look to the sections below to find the issue you're experiencing, +followed by the solution for your provider. + +## Post-installation configuration + +### Add a firewall rule to access Netdata's dashboard + +If you cannot access Netdata's dashboard on your cloud instance via `http://HOST:19999`, and instead get an error page +from your browser that says, "This site can't be reached" (Chrome) or "Unable to connect" (Firefox), you may need to +configure your cloud provider's firewall. + +Cloud providers often create network-level firewalls that run separately from the instance itself. Both AWS and Google +Cloud Platform calls them Virtual Private Cloud (VPC) networks. These firewalls can apply even if you've disabled +firewalls on the instance itself. Because you can modify these firewalls only via the cloud provider's web interface, +it's easy to overlook them when trying to configure and access Netdata's dashboard. + +You can often confirm a firewall issue by querying the dashboard while connected to the instance via SSH: `curl +http://localhost:19999/api/v1/info`. If you see JSON output, Netdata is running properly. If you try the same `curl` +command from a remote system, and it fails, it's likely that a firewall is blocking your requests. + +Another option is to put Netdata behind web server, which will proxy requests through standard HTTP/HTTPS ports +(80/443), which are likely already open on your instance. We have a number of guides available: + +- [Apache](https://github.com/netdata/netdata/blob/master/docs/Running-behind-apache.md) +- [Nginx](https://github.com/netdata/netdata/blob/master/docs/Running-behind-nginx.md) +- [Caddy](https://github.com/netdata/netdata/blob/master/docs/Running-behind-caddy.md) +- [HAProxy](https://github.com/netdata/netdata/blob/master/docs/Running-behind-haproxy.md) +- [lighttpd](https://github.com/netdata/netdata/blob/master/docs/Running-behind-lighttpd.md) + + +To add a firewall rule, go to the [Firewall rules page](https://console.cloud.google.com/networking/firewalls/list) and +click **Create firewall rule**. + +The following configuration has previously worked for Netdata running on GCP instances +([see #7786](https://github.com/netdata/netdata/issues/7786)): + +```conf +Name: <name> +Type: Ingress +Targets: <name-tag> +Filters: 0.0.0.0/0 +Protocols/ports: 19999 +Action: allow +Priority: 1000 +``` + +Read GCP's [firewall documentation](https://cloud.google.com/vpc/docs/using-firewalls) for specific instructions on how +to create a new firewall rule. + diff --git a/packaging/installer/methods/kickstart.md b/packaging/installer/methods/kickstart.md new file mode 100644 index 00000000..b21f4dde --- /dev/null +++ b/packaging/installer/methods/kickstart.md @@ -0,0 +1,237 @@ +<!-- +title: "Install Netdata with kickstart.sh" +description: "The kickstart.sh script installs Netdata from source, including all dependencies required to connect to Netdata Cloud, with a single command." +custom_edit_url: "https://github.com/netdata/netdata/edit/master/packaging/installer/methods/kickstart.md" +sidebar_label: "One line installer (kickstart.sh)" +learn_status: "Published" +learn_rel_path: "Installation/Installation methods" +sidebar_position: 10 +--> + +import { OneLineInstallWget, OneLineInstallCurl } from '@site/src/components/OneLineInstall/' +import { Install, InstallBox } from '@site/src/components/Install/' +import Tabs from '@theme/Tabs'; +import TabItem from '@theme/TabItem'; + +# Install Netdata with kickstart.sh + +  + +`kickstart.sh` is the recommended way of installing Netdata. + +This script works on all Linux distributions and macOS environments, by detecting the optimal method of installing Netdata directly to the operating system (it will never install a docker image of Netdata - to run Netdata in a container [check Installing with Docker](https://learn.netdata.cloud/docs/installing/docker)). + +If you are installing on macOS, make sure to check the [install documentation for macOS](https://github.com/netdata/netdata/blob/master/packaging/installer/methods/macos.md) before continuing. + + +## Verify script integrity + +To use `md5sum` to verify the integrity of the `kickstart.sh` script you will download using the one-line command above, +run the following: + +```bash +[ "<checksum-will-be-added-in-documentation-processing>" = "$(curl -Ss https://my-netdata.io/kickstart.sh | md5sum | cut -d ' ' -f 1)" ] && echo "OK, VALID" || echo "FAILED, INVALID" +``` + +If the script is valid, this command will return `OK, VALID`. + + +## Installation + +> :bulb: Tip +> +> If you are unsure whether you want nightly or stable releases, read the [installation guide](https://github.com/netdata/netdata/blob/master/packaging/installer/README.md#nightly-vs-stable-releases). + +To install Netdata, run the following as your normal user: + +<Tabs> + <TabItem value="wget" label="wget"> + + <OneLineInstallWget/> + + </TabItem> + <TabItem value="curl" label="curl"> + + <OneLineInstallCurl/> + + </TabItem> +</Tabs> + +> :bookmark_tabs: Note +> +> If you plan to also connect the node to Netdata Cloud, make sure to replace `YOUR_CLAIM_TOKEN` with the claim token of your space, +> and `YOUR_ROOM_ID` with the ID of the room you are willing to connect the node to. + + +## What does `kickstart.sh` do? + +The `kickstart.sh` script does the following after being downloaded and run using `sh`: + +- Determines what platform you are running on. +- Checks for an existing installation, and if found updates that instead of creating a new install. +- Attempts to install Netdata using our [official native binary packages](#native-packages). +- If there are no official native binary packages for your system (or installing that way failed), tries to install + using a [static build of Netdata](#static-builds) if one is available. +- If no static build is available, installs required dependencies and then attempts to install by + [building Netdata locally](#local-builds) (by downloading the sources and building them directly). +- Installs `netdata-updater.sh` to `cron.daily`, so your Netdata installation will be updated with new nightly + versions, unless you override that with an [optional parameter](#optional-parameters-to-alter-your-installation). +- Prints a message whether installation succeeded or failed for QA purposes. + +## Optional parameters to alter your installation + +The `kickstart.sh` script accepts a number of optional parameters to control how the installation process works: + +### destination directory + +- `--install-prefix` + Specify an installation prefix for local builds (by default, we use a sane prefix based on the type of system). +- `--old-install-prefix` + Specify the custom local build's installation prefix that should be removed. + +### interactivity + +The script automatically detects if it is running interactively, on a user's terminal, or headless in a CI/CD environment. These are options related to overriding this behavior. + +- `--non-interactive` or `--dont-wait` + Don’t prompt for anything and assume yes whenever possible, overriding any automatic detection of an interactive run. Use this option when installing Netdata agent with a provisioning tool or in CI/CD. +- `--interactive` + Act as if running interactively, even if automatic detection indicates a run is non-interactive. + +### release channel + +By default, the script installs the nightly channel of Netdata, providing you with the most recent Netdata. For production systems where stability is more important than new features, we recommend using the stable channel. + +- `--release-channel` + Specify a particular release channel to install from. Currently supported release channels are: + - `nightly`: Installs a nightly build (this is currently the default). + - `stable`: Installs a stable release. + - `default`: Explicitly request whatever the current default is. +- `--nightly-channel` + Synonym for `--release-channel nightly`. +- `--stable-channel` + Synonym for `--release-channel stable`. +- `--install-version` + Specify the exact version of Netdata to install. + +### install type + +By default the script will prefer native builds when they are available, and then static builds. It will fallback to build from source when all others are not available. + +- `--native-only` + Only install if native binary packages are available. It fails otherwise. +- `--static-only` + Only install if a static build is available. It fails otherwise. + When installing a static build, the parameter `--static-install-options` can provide additional options to pass to the static installer code. +- `--build-only` + Only install using a local build. It fails otherwise. + When it builds from source, the parameter `--local-build-options` can be used to give additional build options. + +### automatic updates + +By default the script installs a cron job to automatically update Netdata to the latest version of the release channel used. + +- `--auto-update` + Enable automatic updates (this is the default). +- `--no-updates` + Disable automatic updates (not recommended). + +### Netdata Cloud related options + +By default, the kickstart script will provide a Netdata agent installation that can potentially communicate with Netdata Cloud, if of course the Netdata agent is further configured to do so. + +- `--claim-token` + Specify a unique claiming token associated with your Space in Netdata Cloud to be used to connect to the node after the install. This will enable, connect and claim the Netdata agent, to Netdata Cloud. +- `--claim-url` + Specify a URL to use when connecting to the cloud. Defaults to `https://app.netdata.cloud`. Use this option to change the Netdata Cloud URL to point to your Netdata Cloud installation. +- `--claim-rooms` + Specify a comma-separated list of tokens for each War Room this node should appear in. +- `--claim-proxy` + Specify a proxy to use when connecting to the cloud in the form of `http://[user:pass@]host:ip` for an HTTP(S) proxy. See [connecting through a proxy](https://github.com/netdata/netdata/blob/master/claim/README.md#connect-through-a-proxy) for details. +- `--claim-only` + If there is an existing install, only try to claim it without attempting to update it. If there is no existing install, install and claim Netdata normally. +- `--require-cloud` + Only install if Netdata Cloud can be enabled. +- `--disable-cloud` + For local builds, don’t build any of the Netdata Cloud code at all. For native packages and static builds, use runtime configuration to disable Netdata Cloud support. + +### anonymous telemetry + +By default, the agent is sending anonymous telemetry data to help us take identify the most common operating systems and the configurations Netdata agents run. We use this information to prioritize our efforts towards what is most commonly used by our community. + +- `--disable-telemetry` + Disable anonymous statistics. + +### reinstalling + +- `--reinstall` + If there is an existing install, reinstall it instead of trying to update it. If there is not an existing install, install netdata normally. +- `--reinstall-even-if-unsafe` + If there is an existing install, reinstall it instead of trying to update it, even if doing so is known to potentially break things (for example, if we cannot detect what type of installation it is). If there is not an existing install, install Netdata normally. +- `--reinstall-clean` + If there is an existing install, uninstall it before trying to install Netdata. Fails if there is no existing install. + +### uninstall + +- `--uninstall` + Uninstall an existing installation of Netdata. Fails if there is no existing install. + +### other options +- `--dry-run` + Show what the installer would do, but don’t actually do any of it. +- `--dont-start-it` + Don’t auto-start the daemon after installing. This parameter is not guaranteed to work. +- `--override-distro` + Override the distro detection logic and assume the system is using a specific Linux distribution and release. Takes a single argument consisting of the values of the `ID`, `VERSION_ID`, and `VERSION_CODENAME` fields from `/etc/os-release` for the desired distribution. + +The following options are mutually exclusive and specify special operations other than trying to install Netdata normally or update an existing install: + +- `--repositories-only` + Only install repository configuration packages instead of doing a full install of Netdata. Automatically sets --native-only. +- `--prepare-offline-install-source` + Instead of insallling the agent, prepare a directory that can be used to install on another system without needing to download anything. See our [offline installation documentation](https://github.com/netdata/netdata/blob/master/packaging/installer/methods/offline.md) for more info. + +### environment variables + +Additionally, the following environment variables may be used to further customize how the script runs (most users +should not need to use special values for any of these): + +- `TMPDIR`: Used to specify where to put temporary files. On most systems, the default we select automatically + should be fine. The user running the script needs to both be able to write files to the temporary directory, + and run files from that location. +- `ROOTCMD`: Used to specify a command to use to run another command with root privileges if needed. By default + we try to use sudo, doas, or pkexec (in that order of preference), but if you need special options for one of + those to work, or have a different tool to do the same thing on your system, you can specify it here. +- `DISABLE_TELEMETRY`: If set to a value other than 0, behave as if `--disable-telemetry` was specified. + + +## Native packages + +We publish official DEB/RPM packages for a number of common Linux distributions as part of our releases and nightly +builds. These packages are available for 64-bit x86 systems. Depending on the distribution and release they may +also be available for 32-bit x86, ARMv7, and AArch64 systems. If a native package is available, it will be used as the +default installation method. This allows you to handle Netdata updates as part of your usual system update procedure. + +If you want to enforce the usage of native packages and have the installer return a failure if they are not available, +you can do so by adding `--native-only` to the options you pass to the installer. + +## Static builds + +We publish pre-built static builds of Netdata for Linux systems. Currently, these are published for 64-bit x86, ARMv7, +AArch64, and POWER8+ hardware. These static builds are able to operate in a mostly self-contained manner and only +require a POSIX compliant shell and a supported init system. These static builds install under `/opt/netdata`. If +you are on a platform which we provide static builds for but do not provide native packages for, a static build +will be used by default for installation. + +If you want to enforce the usage of a static build and have the installer return a failure if one is not available, +you can do so by adding `--static-only` to the options you pass to the installer. + +## Local builds + +For systems which do not have available native packages or static builds, we support building Netdata locally on +the system it will be installed on. When using this approach, the installer will attempt to install any required +dependencies for building Netdata, though this may not always work correctly. + +If you want to enforce the usage of a local build (perhaps because you require a custom installation prefix, +which is not supported with native packages or static builds), you can do so by adding `--build-only` to the +options you pass to the installer. diff --git a/packaging/installer/methods/kubernetes.md b/packaging/installer/methods/kubernetes.md new file mode 100644 index 00000000..17cb9f5e --- /dev/null +++ b/packaging/installer/methods/kubernetes.md @@ -0,0 +1,200 @@ +import Tabs from '@theme/Tabs'; +import TabItem from '@theme/TabItem'; + +# Install Netdata on Kubernetes + +This document details how to install Netdata on an existing Kubernetes (k8s) cluster, and connect it to Netdata Cloud. Read our [Kubernetes visualizations](https://github.com/netdata/netdata/blob/master/docs/cloud/visualize/kubernetes.md) documentation, to see what you will get. + +The [Netdata Helm chart](https://github.com/netdata/helmchart/blob/master/charts/netdata/README.md) installs one `parent` pod for storing metrics and managing alert notifications, plus an additional +`child` pod for every node in the cluster, responsible for collecting metrics from the node, Kubernetes control planes, +pods/containers, and [supported application-specific +metrics](https://github.com/netdata/helmchart#service-discovery-and-supported-services). + +### Prerequisites + +To deploy Kubernetes monitoring with Netdata, you need: + +- A working cluster running Kubernetes v1.9 or newer. +- The [kubectl](https://kubernetes.io/docs/reference/kubectl/overview/) command line tool, within [one minor version + difference](https://kubernetes.io/docs/tasks/tools/install-kubectl/#before-you-begin) of your cluster, on an + administrative system. +- The [Helm package manager](https://helm.sh/) v3.0.0 or newer on the same administrative system. +- A Netdata Cloud account with a Space to connect the cluster to. + +## Deploy Netdata on your Kubernetes Cluster + +First, you need to add the Netdata helm repository, and then install Netdata. +The installation process securely connects your Kubernetes cluster to stream metrics data to Netdata Cloud, enabling Kubernetes-specific visualizations like the health map and time-series composite charts. + +<Tabs groupId="installation_type"> +<TabItem value="new_installations" label="New Installations"> + +<h3> Install Netdata via the <code>helm install</code> command </h3> + +#### Steps + +1. Add the Netdata Helm chart repository by running: + + ```bash + helm repo add netdata https://netdata.github.io/helmchart/ + ``` + +2. To install Netdata using the `helm install` command, run: + + ```bash + helm install netdata netdata/netdata + ``` + + > ### Note + > + > If you plan to connect the node to Netdata Cloud, you can find the command with the right parameters by clicking the "Add Nodes" button in your Space's Nodes tab. + + For more installation options, please read our [Netdata Helm chart for Kubernetes](https://github.com/netdata/helmchart/blob/master/charts/netdata/README.md) reference. + +#### Expected Result + +Run `kubectl get services` and `kubectl get pods` to confirm that your cluster now runs a `netdata` service, one parent pod, and multiple child pods. + +</TabItem> +<TabItem value="existing_installations" label="Existing Installations"> + +<h3> Connect an existing Netdata installation to Netdata Cloud </h3> + +On an existing installation, in order to connect it to Netdata Cloud you will need to override the configuration values by running the `helm upgrade` command and provide a file with the values to override. + +#### Steps + +1. You can start with creating a file called `override.yml` + + ```bash + touch override.yml + ``` + +2. Paste the following into your `override.yml` file. + + ```yaml + parent: + claiming: + enabled: true + token: YOUR_CLAIM_TOKEN + rooms: YOUR_ROOM_ID_A,YOUR_ROOM_ID_B + + child: + claiming: + enabled: true + token: YOUR_CLAIM_TOKEN + rooms: YOUR_ROOM_ID_A,YOUR_ROOM_ID_B + configs: + netdata: + data: | + [global] + memory mode = ram + history = 3600 + [health] + enabled = no + ``` + + > :bookmark_tabs: Note + > + > Make sure to replace `YOUR_CLAIM_TOKEN` with the claim token of your space, + > and `YOUR_ROOM_ID` with the ID of the room you are willing to connect to. + + These settings connect your `parent`/`child` nodes to Netdata Cloud and store more metrics in the nodes' time-series databases. + + > :bookmark_tabs: Info + > + > These override settings, along with the Helm chart's defaults, will retain an hour's worth of metrics (`history = 3600`, or `3600 seconds`) on each child node. Based on your metrics retention needs, and the resources available on your cluster, you may want to increase the `history` setting. + +3. To apply these new settings, run: + + ```bash + helm upgrade -f override.yml netdata netdata/netdata + ``` + +#### Expected Result + +The cluster terminates the old pods and creates new ones with the proper persistence and connection configuration. You'll see your nodes, containers, and pods appear in Netdata Cloud in a few seconds. + +</TabItem> +</Tabs> + +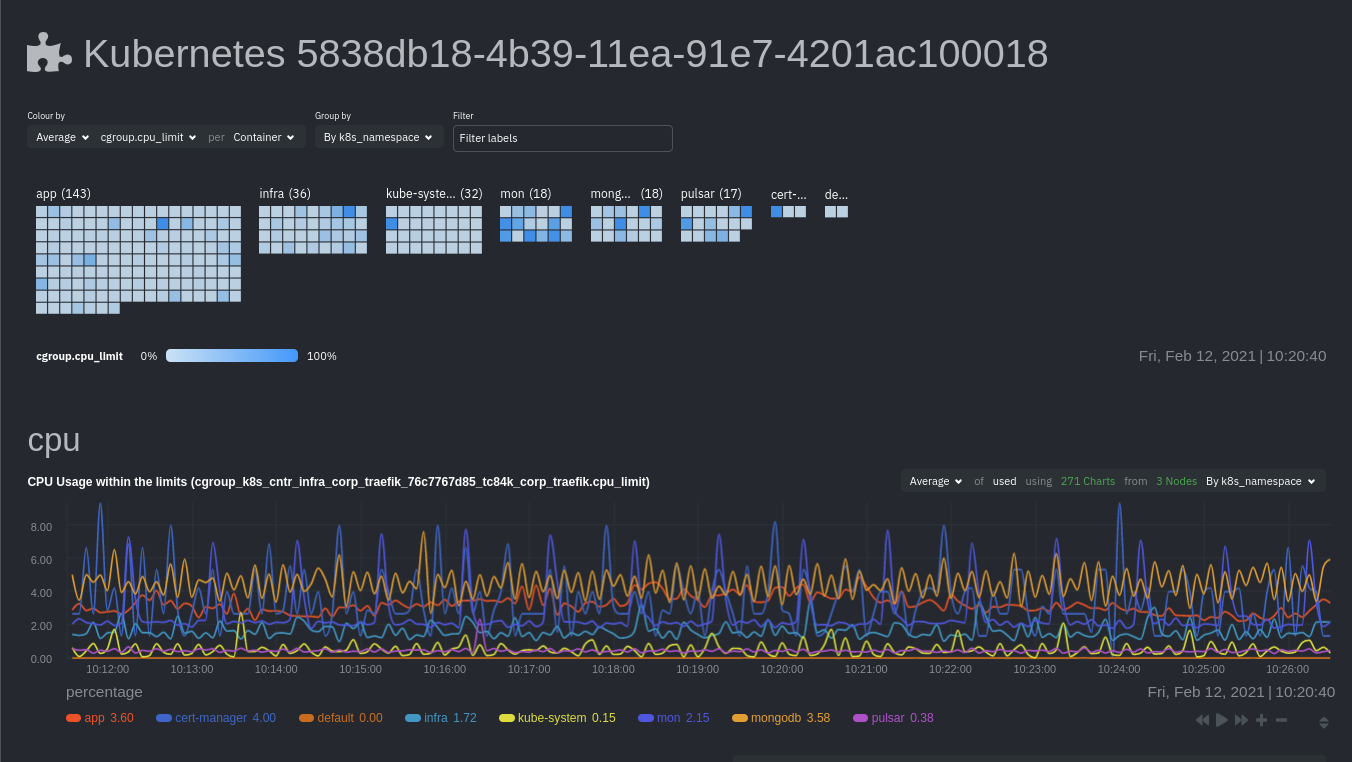 + +If you don't need to configure your Netdata deployment, [skip down](#whats-next) to see how Kubernetes monitoring works +in Netdata, in addition to more guides and resources. + +## Configure your Netdata monitoring deployment + +Read up on the various configuration options in the [Helm chart +documentation](https://github.com/netdata/helmchart#configuration) if you need to tweak your Kubernetes monitoring. + +Your first option is to create an `override.yml` file, if you haven't created one already upon [deploying](#deploy-netdata-on-your-kubernetes-cluster), then apply the new configuration to your cluster with `helm +upgrade`. + +```bash +helm upgrade -f override.yml netdata netdata/netdata +``` + +If you want to change only a single setting, use the `--set` argument with `helm upgrade`. For example, to change the +size of the persistent metrics volume on the parent node: + +```bash +helm upgrade --set parent.database.volumesize=4Gi netdata netdata/netdata +``` + +### Configure service discovery + +Netdata's [service discovery](https://github.com/netdata/agent-service-discovery/#service-discovery), installed as part +of the Helm chart installation, finds what services are running in a cluster's containers and automatically collects +service-level metrics from them. + +Service discovery supports [popular applications](https://github.com/netdata/helmchart#applications) and [Prometheus endpoints](https://github.com/netdata/helmchart#prometheus-endpoints). + +If your cluster runs services on non-default ports or uses non-default names, you may need to configure service +discovery to start collecting metrics from your services. You have to edit the default ConfigMap that is shipped with +the Helmchart and deploy that to your cluster. + +First, copy the default file to your administrative system. + +```bash +curl https://raw.githubusercontent.com/netdata/helmchart/master/charts/netdata/sdconfig/child.yml -o child.yml +``` + +Edit the new `child.yml` file according to your needs. See the [Helm chart configuration](https://github.com/netdata/helmchart#configuration) and the file itself for details. + +You can then run `helm upgrade` with the `--set-file` argument to use your configured `child.yml` file instead of the +default, changing the path if you copied it elsewhere. + +```bash +helm upgrade --set-file sd.child.configmap.from.value=./child.yml netdata netdata/netdata +``` + +Now that you pushed an edited ConfigMap to your cluster, service discovery should find and set up metrics collection +from your non-default service. + +## Update/reinstall the Netdata Helm chart + +If you update the Helm chart's configuration, run `helm upgrade` to redeploy your Netdata service, replacing `netdata` +with the name of the release, if you changed it upon installation: + +```bash +helm upgrade netdata netdata/netdata +``` + +To update Netdata's Helm chart to the latest version, run `helm repo update`, then deploy `upgrade` it`: + +```bash +helm repo update +helm upgrade netdata netdata/netdata +``` + +## What's next? + +[Start Kubernetes monitoring](https://github.com/netdata/netdata/blob/master/docs/cloud/visualize/kubernetes.md) in Netdata Cloud, which comes with meaningful visualizations out of the box. + +### Related reference documentation + +- [Netdata Cloud · Kubernetes monitoring](https://github.com/netdata/netdata/blob/master/docs/cloud/visualize/kubernetes.md) +- [Netdata Helm chart](https://github.com/netdata/helmchart) +- [Netdata service discovery](https://github.com/netdata/agent-service-discovery/) diff --git a/packaging/installer/methods/macos.md b/packaging/installer/methods/macos.md new file mode 100644 index 00000000..480a4128 --- /dev/null +++ b/packaging/installer/methods/macos.md @@ -0,0 +1,118 @@ +<!-- +title: "Install Netdata on macOS" +custom_edit_url: "https://github.com/netdata/netdata/edit/master/packaging/installer/methods/macos.md" +sidebar_label: "macOS" +learn_status: "Published" +learn_rel_path: "Installation/Install on specific environments" +--> + +# Install Netdata on macOS + +Netdata works on macOS, albeit with some limitations. +The number of charts displaying system metrics is limited, but you can use any of Netdata's [external plugins](https://github.com/netdata/netdata/blob/master/collectors/plugins.d/README.md) to monitor any services you might have installed on your macOS system. +You could also use a macOS system as the parent node in a [streaming configuration](https://github.com/netdata/netdata/blob/master/streaming/README.md). + +You can install Netdata in one of the three following ways: + +- **[Install Netdata with the our automatic one-line installation script (recommended)](#install-netdata-with-our-automatic-one-line-installation-script)**, +- [Install Netdata via Homebrew](#install-netdata-via-homebrew) +- [Install Netdata from source](#install-netdata-from-source) + +Each of these installation option requires [Homebrew](https://brew.sh/) for handling dependencies. + +> The Netdata Homebrew package is community-created and -maintained. +> Community-maintained packages _may_ receive support from Netdata, but are only a best-effort affair. Learn more about [Netdata's platform support policy](https://github.com/netdata/netdata/blob/master/packaging/PLATFORM_SUPPORT.md). + +## Install Netdata with our automatic one-line installation script + +**Local Netdata Agent installation** +To install Netdata using our automatic [kickstart](https://github.com/netdata/netdata/blob/master/packaging/installer/README.md#automatic-one-line-installation-script) open a new terminal and run: + +```bash +curl https://my-netdata.io/kickstart.sh > /tmp/netdata-kickstart.sh && sh /tmp/netdata-kickstart.sh +``` +The Netdata Agent is installed under `/usr/local/netdata`. Dependencies are handled via Homebrew. + +**Automatically connect to Netdata Cloud during installation** + +The `kickstart.sh` script accepts additional parameters to automatically [connect](https://github.com/netdata/netdata/blob/master/claim/README.md) your node to Netdata +Cloud immediately after installation. Find the `token` and `rooms` strings by [signing in to Netdata +Cloud](https://app.netdata.cloud/sign-in?cloudRoute=/spaces), then clicking on **Connect Nodes** in the [Spaces management +area](https://github.com/netdata/netdata/blob/master/docs/cloud/manage/organize-your-infrastrucutre-invite-your-team.md#netdata-cloud-spaces). + +- `--claim-token`: Specify a unique claiming token associated with your Space in Netdata Cloud to be used to connect to the node + after the install. +- `--claim-rooms`: Specify a comma-separated list of tokens for each War Room this node should appear in. +- `--claim-proxy`: Specify a proxy to use when connecting to the cloud in the form of `http://[user:pass@]host:ip` for an HTTP(S) proxy. + See [connecting through a proxy](https://github.com/netdata/netdata/blob/master/claim/README.md#connect-through-a-proxy) for details. +- `--claim-url`: Specify a URL to use when connecting to the cloud. Defaults to `https://app.netdata.cloud`. + +For example: +```bash +curl https://my-netdata.io/kickstart.sh > /tmp/netdata-kickstart.sh && sh /tmp/netdata-kickstart.sh --install-prefix /usr/local/ --claim-token TOKEN --claim-rooms ROOM1,ROOM2 --claim-url https://app.netdata.cloud +``` +The Netdata Agent is installed under `/usr/local/netdata` on your machine. Your machine will also show up as a node in your Netdata Cloud. + +If you experience issues while claiming your node, follow the steps in our [Troubleshooting](https://github.com/netdata/netdata/blob/master/claim/README.md#troubleshooting) documentation. +## Install Netdata via Homebrew + +### For macOS Intel + +To install Netdata and all its dependencies, run Homebrew using the following command: + +```sh +brew install netdata +``` +Homebrew will place your Netdata configuration directory at `/usr/local/etc/netdata/`. + +Use the `edit-config` script and the files in this directory to configure Netdata. For reference, you can find stock configuration files at `/usr/local/Cellar/netdata/{NETDATA_VERSION}/lib/netdata/conf.d/`. + +### For Apple Silicon + +To install Netdata and all its dependencies, run Homebrew using the following command: + +```sh +brew install netdata +``` + +Homebrew will place your Netdata configuration directory at `/opt/homebrew/etc/netdata/`. + +Use the `edit-config` script and the files in this directory to configure Netdata. For reference, you can find stock configuration files at `/opt/homebrew/Cellar/netdata/{NETDATA_VERSION}/lib/netdata/conf.d/`. + + + +Skip on ahead to the [What's next?](#whats-next) section to find links to helpful post-installation guides. + +## Install Netdata from source + +We don't recommend installing Netdata from source on macOS, as it can be difficult to configure and install dependencies manually. + +1. Open your terminal of choice and install the Xcode development packages: + + ```bash + xcode-select --install + ``` + +2. Click **Install** on the Software Update popup window that appears. +3. Use the same terminal session to install some of Netdata's prerequisites using Homebrew. If you don't want to use [Netdata Cloud](https://github.com/netdata/netdata/blob/master/docs/quickstart/infrastructure.md), you can omit `cmake`. + + ```bash + brew install ossp-uuid autoconf automake pkg-config libuv lz4 json-c openssl libtool cmake + ``` + +4. Download Netdata from our GitHub repository: + + ```bash + git clone https://github.com/netdata/netdata.git --recursive + ``` + +5. `cd` into the newly-created directory and then start the installer script: + + ```bash + cd netdata/ + sudo ./netdata-installer.sh --install-prefix /usr/local + ``` + +> Your Netdata configuration directory will be at `/usr/local/netdata/`. +> Your stock configuration directory will be at `/usr/local/lib/netdata/conf.d/`. +> The installer will also install a startup plist to start Netdata when your macOS system boots. diff --git a/packaging/installer/methods/manual.md b/packaging/installer/methods/manual.md new file mode 100644 index 00000000..269b67c1 --- /dev/null +++ b/packaging/installer/methods/manual.md @@ -0,0 +1,248 @@ +<!-- +title: "Install Netdata on Linux from a Git checkout" +description: "Use the Netdata Agent source code from GitHub, plus helper scripts to set up your system, to install Netdata without packages or binaries." +custom_edit_url: "https://github.com/netdata/netdata/edit/master/packaging/installer/methods/manual.md" +sidebar_label: "From a Git checkout" +learn_status: "Published" +learn_rel_path: "Installation/Installation methods" +sidebar_position: 30 +--> + +# Install Netdata on Linux from a Git checkout + +To install the latest git version of Netdata, please follow these 2 steps: + +1. [Prepare your system](#prepare-your-system) + + Install the required packages on your system. + +2. [Install Netdata](#install-netdata) + + Download and install Netdata. You can also update it the same way. + +## Prepare your system + +Before you begin, make sure that your repo and the repo's submodules are clean from any previous builds and up to date. +Otherwise, [perform a cleanup](https://github.com/netdata/netdata/blob/master/packaging/installer/methods/manual.md#perform-a-cleanup-in-your-netdata-repo) + +Use our automatic requirements installer (_no need to be `root`_), which attempts to find the packages that +should be installed on your system to build and run Netdata. It supports a large variety of major Linux distributions +and other operating systems and is regularly tested. You can find this tool [here](https://raw.githubusercontent.com/netdata/netdata/master/packaging/installer/install-required-packages.sh) or run it directly with `bash <(curl -sSL https://raw.githubusercontent.com/netdata/netdata/master/packaging/installer/install-required-packages.sh)`. Otherwise read on for how to get requires packages manually: + +- **Alpine** Linux and its derivatives + - You have to install `bash` yourself, before using the installer. + +- **Gentoo** Linux and its derivatives + +- **Debian** Linux and its derivatives (including **Ubuntu**, **Mint**) + +- **Red Hat Enterprise Linux** and its derivatives (including **Fedora**, **CentOS**, **Amazon Machine Image**) + - Please note that for RHEL/CentOS you need + [EPEL](http://www.tecmint.com/how-to-enable-epel-repository-for-rhel-centos-6-5/). + In addition, RHEL/CentOS version 6 also need + [OKay](https://okay.com.mx/blog-news/rpm-repositories-for-centos-6-and-7.html) for package libuv version 1. + - CentOS 8 / RHEL 8 requires a bit of extra work. See the dedicated section below. + +- **SUSE** Linux and its derivatives (including **openSUSE**) + +- **SLE12** Must have your system registered with SUSE Customer Center or have the DVD. See + [#1162](https://github.com/netdata/netdata/issues/1162) + +Install the packages for having a **basic Netdata installation** (system monitoring and many applications, without `mysql` / `mariadb`, `named`, hardware sensors and `SNMP`): + +```sh +curl -Ss 'https://raw.githubusercontent.com/netdata/netdata/master/packaging/installer/install-required-packages.sh' >/tmp/install-required-packages.sh && bash /tmp/install-required-packages.sh -i netdata +``` + +Install all the required packages for **monitoring everything Netdata can monitor**: + +```sh +curl -Ss 'https://raw.githubusercontent.com/netdata/netdata/master/packaging/installer/install-required-packages.sh' >/tmp/install-required-packages.sh && bash /tmp/install-required-packages.sh -i netdata-all +``` + +If the above do not work for you, please [open a github +issue](https://github.com/netdata/netdata/issues/new?title=packages%20installer%20failed&labels=installation%20help&body=The%20experimental%20packages%20installer%20failed.%0A%0AThis%20is%20what%20it%20says:%0A%0A%60%60%60txt%0A%0Aplease%20paste%20your%20screen%20here%0A%0A%60%60%60) +with a copy of the message you get on screen. We are trying to make it work everywhere (this is also why the script +[reports back](https://github.com/netdata/netdata/issues/2054) success or failure for all its runs). + +--- + +This is how to do it by hand: + +```sh +# Debian / Ubuntu +apt-get install zlib1g-dev uuid-dev libuv1-dev liblz4-dev libssl-dev libelf-dev libmnl-dev libprotobuf-dev protobuf-compiler gcc g++ make git autoconf autoconf-archive autogen automake pkg-config curl python cmake + +# Fedora +dnf install zlib-devel libuuid-devel libuv-devel lz4-devel openssl-devel elfutils-libelf-devel libmnl-devel protobuf-devel protobuf-compiler gcc gcc-c++ make git autoconf autoconf-archive autogen automake pkgconfig curl findutils python cmake + +# CentOS / Red Hat Enterprise Linux +yum install autoconf automake curl gcc gcc-c++ git libmnl-devel libuuid-devel openssl-devel libuv-devel lz4-devel elfutils-libelf-devel protobuf protobuf-devel protobuf-compiler make nc pkgconfig python zlib-devel cmake + +# openSUSE +zypper install zlib-devel libuuid-devel libuv-devel liblz4-devel libopenssl-devel libelf-devel libmnl-devel protobuf-devel gcc gcc-c++ make git autoconf autoconf-archive autogen automake pkgconfig curl findutils python cmake +``` + +Once Netdata is compiled, to run it the following packages are required (already installed using the above commands): + +| package | description| +|:-----:|-----------| +| `libuuid` | part of `util-linux` for GUIDs management| +| `zlib` | gzip compression for the internal Netdata web server| +| `libuv` | Multi-platform support library with a focus on asynchronous I/O, version 1 or greater| + +*Netdata will fail to start without the above.* + +Netdata plugins and various aspects of Netdata can be enabled or benefit when these are installed (they are optional): + +| package |description| +|:-----:|-----------| +| `bash`|for shell plugins and **alert notifications**| +| `curl`|for shell plugins and **alert notifications**| +| `iproute` or `iproute2`|for monitoring **Linux traffic QoS**<br/>use `iproute2` if `iproute` reports as not available or obsolete| +| `python`|for most of the external plugins| +| `python-yaml`|used for monitoring **beanstalkd**| +| `python-beanstalkc`|used for monitoring **beanstalkd**| +| `python-mysqldb`<br/>or<br/>`python-pymysql`|used for monitoring **mysql** or **mariadb** databases<br/>`python-mysqldb` is a lot faster and thus preferred| +| `nodejs`|used for `node.js` plugins for monitoring **named** and **SNMP** devices| +| `lm-sensors`|for monitoring **hardware sensors**| +| `libelf`|for monitoring kernel-level metrics using eBPF| +| `libmnl`|for collecting netfilter metrics| +| `netcat`|for shell plugins to collect metrics from remote systems| + +*Netdata will greatly benefit if you have the above packages installed, but it will still work without them.* + +Netdata DB engine can be enabled when these are installed (they are optional): + +| package | description| +|:-----:|-----------| +| `liblz4` | Extremely fast compression algorithm, version r129 or greater| +| `openssl`| Cryptography and SSL/TLS toolkit| + +*Netdata will greatly benefit if you have the above packages installed, but it will still work without them.* + +Netdata Cloud support may require the following packages to be installed: + +| package | description | +|:---------:|--------------------------------------------------------------------------------------------------------------------------------------| +| `cmake` | Needed at build time if you aren't using your distribution's version of libwebsockets or are building on a platform other than Linux | +| `openssl` | Needed to secure communications with the Netdata Cloud | +| `protobuf`| Used for the new Cloud<->Agent binary protocol | + +*Netdata will greatly benefit if you have the above packages installed, but it will still work without them.* + +### CentOS / RHEL 6.x + +On CentOS / RHEL 6.x, many of the dependencies for Netdata are only +available with versions older than what we need, so special setup is +required if manually installing packages. + +CentOS 6.x: + +- Enable the EPEL repo +- Enable the additional repo from [okay.network](https://okay.network/blog-news/rpm-repositories-for-centos-6-and-7.html) + +And install the minimum required dependencies. + +### CentOS / RHEL 8.x + +For CentOS / RHEL 8.x a lot of development packages have moved out into their +own separate repositories. Some other dependencies are either missing completely +or have to be sourced by 3rd-parties. + +CentOS 8.x: + +- Enable the PowerTools repo +- Enable the EPEL repo +- Enable the Extra repo from [OKAY](https://okay.network/blog-news/rpm-repositories-for-centos-6-and-7.html) + +And install the minimum required dependencies: + +```sh +# Enable config-manager +yum install -y 'dnf-command(config-manager)' + +# Enable PowerTools +yum config-manager --set-enabled powertools + +# Enable EPEL +yum install -y epel-release + +# Install Repo for libuv-devl (NEW) +yum install -y http://repo.okay.com.mx/centos/8/x86_64/release/okay-release-1-3.el8.noarch.rpm + +# Install Devel Packages +yum install autoconf automake curl gcc git cmake libuuid-devel openssl-devel libuv-devel lz4-devel make nc pkgconfig python3 zlib-devel + +``` + +## Install Netdata + +Do this to install and run Netdata: + +```sh +# download it - the directory 'netdata' will be created +git clone https://github.com/netdata/netdata.git --depth=100 --recursive +cd netdata + +# run script with root privileges to build, install, start Netdata +./netdata-installer.sh +``` + +- If you don't want to run it straight-away, add `--dont-start-it` option. + +- You can also append `--stable-channel` to fetch and install only the official releases from GitHub, instead of the nightly builds. + +- If you don't want to install it on the default directories, you can run the installer like this: `./netdata-installer.sh --install-prefix /opt`. This one will install Netdata in `/opt/netdata`. + +- If your server does not have access to the internet and you have manually put the installation directory on your server, you will need to pass the option `--disable-go` to the installer. The option will prevent the installer from attempting to download and install `go.d.plugin`. + +## Optional parameters to alter your installation + +`netdata-installer.sh` accepts a few parameters to customize your installation: + +- `--dont-wait`: Enable automated installs by not prompting for permission to install any required packages. +- `--dont-start-it`: Prevent the installer from starting Netdata automatically. +- `--stable-channel`: Automatically update only on the release of new major versions. +- `--nightly-channel`: Automatically update on every new nightly build. +- `--disable-telemetry`: Opt-out of [anonymous statistics](https://github.com/netdata/netdata/blob/master/docs/anonymous-statistics.md) we use to make + Netdata better. +- `--no-updates`: Prevent automatic updates of any kind. +- `--reinstall`: If an existing install is detected, reinstall instead of trying to update it. Note that this + cannot be used to change installation types. +- `--local-files`: Used for [offline installations](https://github.com/netdata/netdata/blob/master/packaging/installer/methods/offline.md). Pass four file paths: the Netdata + tarball, the checksum file, the go.d plugin tarball, and the go.d plugin config tarball, to force kickstart run the + process using those files. This option conflicts with the `--stable-channel` option. If you set this _and_ + `--stable-channel`, Netdata will use the local files. + +### Connect node to Netdata Cloud during installation + +Unlike the [`kickstart.sh`](https://github.com/netdata/netdata/blob/master/packaging/installer/methods/kickstart.md), the `netdata-installer.sh` script does +not allow you to automatically [connect](https://github.com/netdata/netdata/blob/master/claim/README.md) your node to Netdata Cloud immediately after installation. + +See the [connect to cloud](https://github.com/netdata/netdata/blob/master/claim/README.md) doc for details on connecting a node with a manual installation of Netdata. + +### 'nonrepresentable section on output' errors + +Our current build process unfortunately has some issues when using certain configurations of the `clang` C compiler on Linux. + +If the installation fails with errors like `/bin/ld: externaldeps/libwebsockets/libwebsockets.a(context.c.o): relocation R_X86_64_32 against '.rodata.str1.1' can not be used when making a PIE object; recompile with -fPIC`, and you are trying to build with `clang` on Linux, you will need to build Netdata using GCC to get a fully functional install. + +In most cases, you can do this by running `CC=gcc ./netdata-installer.sh`. + + +### Perform a cleanup in your netdata repo + +The Netdata repo consist of the main git tree and it's submodules. Either working on a fork or on the main repo you need to make sure that there +are no "leftover" artifacts from previous builds and that your submodules are up to date to the **corresponding checkouts**. + +> #### Important: Make sure that you have commited any work in progress, before you proceed the with the clean up instruction below + + +```sh +git clean -dfx && git submodule foreach 'git clean -dfx' && git submodule update --recursive --init +``` + + +> Note: In previous builds, you may have created artifacts belonging to an another user (e.g root), so you may need to run +> each of the _git clean_ commands as sudoer. diff --git a/packaging/installer/methods/methods.md b/packaging/installer/methods/methods.md new file mode 100644 index 00000000..f9ca2253 --- /dev/null +++ b/packaging/installer/methods/methods.md @@ -0,0 +1,26 @@ +<!-- +title: "Installation methods" +description: "Netdata can be installed as a DEB/RPM package, a static binary, a docker container or from source" +custom_edit_url: https://github.com/netdata/netdata/edit/master/packaging/installer/methods/methods.md +sidebar_label: "Installation methods" +learn_status: "Published" +learn_rel_path: "Installation/Installation methods" +sidebar_position: 30 +--> + +# Installation methods + +Netdata can be installed: + +- [As a DEB/RPM package](https://github.com/netdata/netdata/blob/master/packaging/installer/methods/packages.md) +- [As a static binary](https://github.com/netdata/netdata/blob/master/packaging/makeself/README.md) +- [From a git checkout](https://github.com/netdata/netdata/blob/master/packaging/installer/methods/manual.md) +- [As a docker container](https://github.com/netdata/netdata/blob/master/packaging/docker/README.md) + +The [one line installer kickstart.sh](https://github.com/netdata/netdata/blob/master/packaging/installer/methods/kickstart.md) +picks the most appropriate method out of the first three for any system +and is the recommended installation method, if you don't use containers. + +`kickstart.sh` can also be used for +[offline installation](https://github.com/netdata/netdata/blob/master/packaging/installer/methods/offline.md), +suitable for air-gapped systems. diff --git a/packaging/installer/methods/offline.md b/packaging/installer/methods/offline.md new file mode 100644 index 00000000..f2b6cc41 --- /dev/null +++ b/packaging/installer/methods/offline.md @@ -0,0 +1,59 @@ +<!-- +title: "Install Netdata on offline systems" +description: "Install the Netdata Agent on offline/air gapped systems to benefit from real-time, per-second monitoring without connecting to the internet." +custom_edit_url: "https://github.com/netdata/netdata/edit/master/packaging/installer/methods/offline.md" +sidebar_label: "Offline systems" +learn_status: "Published" +learn_rel_path: "Installation/Installation methods" +sidebar_position: 50 +--> + +# Install Netdata on offline systems + +Our kickstart install script provides support for installing the Netdata Agent on air-gapped systems which do not have a +usable internet connection by prefetching all of the required files so that they can be copied to the target system. +Currently, we only support using static installs with this method. There are tentative plans to support building +locally on offline systems as well, but there is currently no estimate of when this functionality may be implemented. + +Users who wish to use native packages on offline systems may be able to do so using whatever tooling their +distribution already provides for offline package management (such as `apt-offline` on Debian or Ubuntu systems), +but this is not officially supported. + +## Preparing the offline installation source + +The first step to installing Netdata on an offline system is to prepare the offline installation source. This can +be as a regular user from any internet connected system that has the following tools available: + +- cURL or wget +- sha256sum or shasum +- A standard POSIX compliant shell + +To prepare the offline installation source, simply run: + +```bash +wget -O /tmp/netdata-kickstart.sh https://my-netdata.io/kickstart.sh && sh /tmp/netdata-kickstart.sh --prepare-offline-install-source ./netdata-offline +``` + +or + +```bash +curl https://my-netdata.io/kickstart.sh > /tmp/netdata-kickstart.sh && sh /tmp/netdata-kickstart.sh --prepare-offline-install-source ./netdata-offline +``` + +> The exact name used for the directory does not matter, you can specify any other name you want in place of `./netdata-offline`. + +This will create a directory called `netdata-offline` in the current directory and place all the files required for an offline install in it. + +If you want to use a specific release channel (nightly or stable), it _must_ be specified on this step using the +appropriate option for the kickstart script. + +## Installing on the target system + +Once you have prepared the offline install source, you need to copy the offline install source directory to the +target system. This can be done in any manner you like, as long as filenames are not changed. + +After copying the files, simply run the `install.sh` script located in the +offline install source directory. It accepts all the [same options as the kickstart +script](https://github.com/netdata/netdata/blob/master/packaging/installer/methods/kickstart.md#optional-parameters-to-alter-your-installation) for further +customization of the installation, though it will default to not enabling automatic updates (as they are not +supported on offline installs). diff --git a/packaging/installer/methods/packages.md b/packaging/installer/methods/packages.md new file mode 100644 index 00000000..d49e2139 --- /dev/null +++ b/packaging/installer/methods/packages.md @@ -0,0 +1,151 @@ +<!-- +title: "Install Netdata using native DEB/RPM packages." +description: "Instructions for how to install Netdata using native DEB or RPM packages." +custom_edit_url: "https://github.com/netdata/netdata/edit/master/packaging/installer/methods/packages.md" +sidebar_label: "Native DEB/RPM packages" +learn_status: "Published" +learn_rel_path: "Installation/Installation methods" +sidebar_position: 20 +--> + +# Install Netdata using native DEB/RPM packages. + +For most common Linux distributions that use either DEB or RPM packages, Netdata provides pre-built native packages +for current releases in-line with +our [official platform support policy](https://github.com/netdata/netdata/blob/master/packaging/PLATFORM_SUPPORT.md). +These packages will be used by default when attempting to install on a supported platform using our +[kickstart.sh installer script](https://github.com/netdata/netdata/blob/master/packaging/installer/methods/kickstart.md). + +When using the kickstart script, you can force usage of native DEB or RPM packages by passing the option +`--native-only` when invoking the script. This will cause it to only attempt to use native packages for the install, +and fail if it cannot do so. + + + +> ### Note +> +> In July 2022, we switched hosting of our native packages from Package Cloud to self-hosted repositories. +> We still maintain the Package cloud repositories, but they are not guaranteed to work and may be removed +> without prior warning. +> +> When selecting a repository configuration package, note that the version 2 packages provide configuration for +> our self-hosted repositories, and then version 1 packages provide configuration for Package Cloud. + + +## Manual setup of RPM packages. + +Netdata’s official RPM repositories are hosted at https://repo.netdata.cloud/repos. We provide four groups of +repositories at that top level: + +- `stable`: Contains packages for stable releases of the Netdata Agent. +- `edge`: Contains packages for nightly builds of the Netdata Agent. +- `repoconfig`: Provides packages that set up configuration files for using the other repositories. +- `devel`: Is used for one-off development builds of the Netdata Agent, and can simply be ignored by users. + +Within each top level group of repositories, there are directories for each supported group of distributions: + +- `amazonlinux`: Is for Amazon Linux and binary compatible distros. +- `el`: Is for Red Hat Enterprise Linux and binary compatible distros that are not covered by other repos, such + as CentOS, Alma Linux, and Rocky Linux. +- `fedora`: Is for Fedora and binary compatible distros. +- `ol`: Is for Oracle Linux and binary compatible distros. +- `opensuse`: Is for openSUSE and binary compatible distros. + +Under each of those directories is a directory for each supported release of that distribution, and under that a +directory for each supported CPU architecture which contains the actual repository. + +For example, for stable release packages for RHEL 9 on 64-bit x86, the full URL for the repository would be +https://repo.netdata.cloud/repos/stable/el/9/x86_64/ + +Our RPM packages and repository metadata are signed using a GPG key with a user name of ‘Netdatabot’. The +current key fingerprint is `6588FDD7B14721FE7C3115E6F9177B5265F56346`. The associated public key can be fetched from +`https://repo.netdata.cloud/netdatabot.gpg.key`. + +If you are explicitly configuring a system to use our repositories, the recommended setup is to download the +appropriate repository configuration package from https://repo.netdata.cloud/repos/repoconfig and install it +directly on the target system using the system package manager. This will ensure any packages needed to use the +repository are also installed, and will help enable a seamless transition if we ever need to change our infrastructure. + +> ### Note +> +> On RHEL and other systems that use the `el` repostiroies, some of the dependencies for Netdata can only be found +> in the EPEL repository, which is not enabled or installed by default on most of these systems. This additional +> repository _should_ be pulled in automatically by our repository config packages, but if it is not you may need +> to manually install `epel-release` to be able to successfully install the Netdata packages. + +## Manual setup of DEB packages. + +Netdata’s official DEB repositories are hosted at https://repo.netdata.cloud/repos. We provide four groups of +repositories at that top level: + +- `stable`: Contains packages for stable releases of the Netdata Agent. +- `edge`: Contains packages for nightly builds of the Netdata Agent. +- `repoconfig`: Provides packages that set up configuration files for using the other repositories. +- `devel`: Is used for one-off development builds of the Netdata Agent, and can simply be ignored by users. + +Within each top level group of repositories, there are directories for each supported group of distributions: + +- `debian`: Is for Debian Linux and binary compatible distros. +- `ubuntu`: Is for Ubuntu Linux and binary compatible distros. + +Under each of these directories is a directory for each supported release, corresponding to the release codename. + +These repositories are set up as what Debian calls ‘flat repositories’, and are available via both HTTP and HTTPS. + +As a result of this structure, the required APT sources entry for stable packages for Debian 11 (Bullseye) is: + +``` +deb http://repo.netdata.cloud/repos/stable/debian/ bullseye/ +``` + +Note the `/` at the end of the codename, this is required for the repository to be processed correctly. + +Our DEB packages and repository metadata are signed using a GPG key with a user name of ‘Netdatabot’. The +current key fingerprint is `6588FDD7B14721FE7C3115E6F9177B5265F56346`. The associated public key can be fetched from +`https://repo.netdata.cloud/netdatabot.gpg.key`. + +If you are explicitly configuring a system to use our repositories, the recommended setup is to download the +appropriate repository configuration package from https://repo.netdata.cloud/repos/repoconfig and install it +directly on the target system using the system package manager. This will ensure any packages needed to use the +repository are also installed, and will help enable a seamless transition if we ever need to change our infrastructure. + +## Local mirrors of the official Netdata repositories + +Local mirrors of our official repositories can be created in one of two ways: + +1. Using the standard tooling for mirroring the type of repository you want a local mirror of, such as Aptly for + APT repositories, or reposync for RPM repositories. For this approach, please consult the documentation for + the specific tool you are using for info on how to mirror the repositories. +2. Using a regular website mirroring tool, such as GNU wget’s `--mirror` option. For this approach, simply point + your mirroring tool at `https://repo.netdata.cloud/repos/`, and everything should just work. + +We do not provide official support for mirroring our repositories, +but we do have some tips for anyone looking to do so: + +- Our `robots.txt` file explicitly disallows indexing, so if you’re using a regular website mirroring tool, + you wil need to tell it to ignore `robots.txt` (for example, if using GNU wget, add `-e robots=off` to the + options you pass) to ensure that it actually retrieves everything. +- Excluding special cases of caching proxies (such as apt-cacher-ng), our repository configuration packages _DO NOT_ + work with custom local mirrors. Thus, you will need to manually configure your systems to use your local mirror. +- Packages are published as they are built, with 64-bit x86 packages being built first, followed by 32-bit x86, + and then non-x86 packages in alphabetical order of the CPU architecture. Because of the number of different + packages being built, this means that packages for a given nightly build or stable release are typically published + over the course of a few hours, usually starting about 15-20 minutes after the build or release is started. +- Repository metadata is updated every hour on the hour, and the process may take anywhere from a few seconds to + more than 20 minutes. Because of this, it makes little sense to sync your mirror more frequently than once an hour, + and it’s generally preferred to start syncing at least 30 minutes into the hour. +- A full mirror of all of our repositories currently requires up to 100 GB of storage space, though the exact + amount of space needed fluctuates over time. Because of this, users seeking to mirror our repositories are + encouraged to mirror only those repositories they actually need instead of mirroring everything. +- If syncing daily (or less frequently), some time between 05:00 and 08:00 UTC each day is usually the saftest + time to do so, as publishing nightly packages will almost always be done by this point, and publishing of stable + releases typically happens after that time window. +- If you intend to use our existing GPG signatures on the repository metadata and packages, you probably also want + a local copy of our public GPG key, which can be fetched from `https://repo.netdata.cloud/netdatabot.gpg.key`. + +## Public mirrors of the official Netdata repositories + +There are no official public mirrors of our repositories. + +If you wish to provide a public mirror of our official repositories, you are free to do so, but we kindly ask that +you make it clear to your users that your mirror is not an official mirror of our repositories. diff --git a/packaging/installer/methods/pfsense.md b/packaging/installer/methods/pfsense.md new file mode 100644 index 00000000..965fba8d --- /dev/null +++ b/packaging/installer/methods/pfsense.md @@ -0,0 +1,87 @@ +<!-- +title: "Install Netdata on pfSense" +description: "Install Netdata on pfSense to monitor the health and performance of firewalls with thousands of real-time, per-second metrics." +custom_edit_url: https://github.com/netdata/netdata/edit/master/packaging/installer/methods/pfsense.md +sidebar_label: "pfSense" +learn_status: "Published" +learn_rel_path: "Installation/Install on specific environments" +--> + +# Install Netdata on pfSense CE + +> 💡 This document is maintained by Netdata's community, and may not be completely up-to-date. Please double-check the +> details of the installation process, such as version numbers for downloadable packages, before proceeding. +> +> You can help improve this document by [submitting a +> PR](https://github.com/netdata/netdata/edit/master/packaging/installer/methods/pfsense.md) with your recommended +> improvements or changes. Thank you! + +## Install prerequisites/dependencies + +To install Netdata on pfSense, first enable the [FreeBSD package repo](https://docs.netgate.com/pfsense/en/latest/recipes/freebsd-pkg-repo.html) +Then run the following command (within a shell or under the **Diagnostics/Command** +prompt within the pfSense web interface). + +```bash +pkg install -y pkgconf bash e2fsprogs-libuuid libuv nano +``` + +Then run the following commands to download various dependencies from the FreeBSD repository. + +```sh +pkg install json-c-0.15_1 +pkg install py39-certifi-2023.5.7 +pkg install py39-asn1crypto +pkg install py39-pycparser +pkg install py39-cffi +pkg install py39-six +pkg install py39-cryptography +pkg install py39-idna +pkg install py39-openssl +pkg install py39-pysocks +pkg install py39-urllib3 +pkg install py39-yaml +``` + +> ⚠️ If any of the above commands return a `Not Found` error, you need to manually search for the latest package in the +> [FreeBSD repository](https://www.freebsd.org/ports/) or by running `pkg search`. Search for the package's name, such as `py37-cffi`, find the +> latest version number, and update the command accordingly. + +> ⚠️ On pfSense 2.4.5, Python version 3.7 may be installed by the system, in which case you should should not install +> Python from the FreeBSD repository as instructed above. + +> ⚠️ If you are using the `apcupsd` collector, you need to make sure that apcupsd is up before starting Netdata. +> Otherwise a infinitely running `cat` process triggered by the default activated apcupsd charts plugin will eat up CPU +> and RAM (`/tmp/.netdata-charts.d-*/run-*`). This also applies to `OPNsense`. + +## Install Netdata + +You can now install Netdata from the FreeBSD repository. + +```bash +pkg install netdata +``` + +> ⚠️ If the above command returns a `Not Found` error, you need to manually search for the latest version of Netdata in +> the [FreeBSD repository](https://www.freebsd.org/ports/). Search for `netdata`, find the latest version number, and +> update the command accordingly. + +You must edit `/usr/local/etc/netdata/netdata.conf` and change `bind to = 127.0.0.1` to `bind to = 0.0.0.0`. + +To start Netdata manually, run `service netdata onestart`. + +Visit the Netdata dashboard to confirm it's working: `http://<pfsenseIP>:19999` + +To start Netdata automatically every boot, add `service netdata onestart` as a Shellcmd entry within the pfSense web +interface under **Services/Shellcmd**. You'll need to install the Shellcmd package beforehand under **System/Package +Manager/Available Packages**. The Shellcmd Type should be set to `Shellcmd`. + Alternatively more information can be found in +<https://doc.pfsense.org/index.php/Installing_FreeBSD_Packages>, for achieving the same via the command line and +scripts. + +If you experience an issue with `/usr/bin/install` being absent in pfSense 2.3 or earlier, update pfSense or use a +workaround from <https://redmine.pfsense.org/issues/6643> + +**Note:** In pfSense, the Netdata configuration files are located under `/usr/local/etc/netdata`. + + diff --git a/packaging/installer/methods/source.md b/packaging/installer/methods/source.md new file mode 100644 index 00000000..8f34218a --- /dev/null +++ b/packaging/installer/methods/source.md @@ -0,0 +1,244 @@ +<!-- +title: "Manually build Netdata from source" +description: "Package maintainers and power users may be interested in manually building Netdata from source without using any of our installation scripts." +custom_edit_url: "https://github.com/netdata/netdata/edit/master/packaging/installer/methods/source.md" +sidebar_label: "Manually build Netdata from source" +learn_status: "Published" +learn_rel_path: "Installation/Package maintainers" +sidebar_position: 100 +--> + +# Manually build Netdata from source + +These instructions are for advanced users and distribution package +maintainers. Unless this describes you, you almost certainly want +to follow [our guide for manually installing Netdata from a git +checkout](https://github.com/netdata/netdata/blob/master/packaging/installer/methods/manual.md) instead. + +## Required dependencies + +At a bare minimum, Netdata requires the following libraries and tools +to build and run successfully: + +- libuuid +- libuv version 1.0 or newer +- zlib +- GNU autoconf +- GNU automake +- GCC or Xcode (Clang is known to have issues in certain configurations, see [Using Clang](#using-clang)) +- A version of `make` compatible with GNU automake +- Git (we use git in the build system to generate version info, don't need a full install, just a working `git show` command) + +Additionally, the following build time features require additional dependencies: + +- TLS support for the web GUI: + - OpenSSL 1.0.2 or newer _or_ LibreSSL 3.0.0 or newer. +- dbengine metric storage: + - liblz4 r129 or newer + - OpenSSL 1.0 or newer (LibreSSL _amy_ work, but is largely untested). +- Netdata Cloud support: + - A working internet connection + - A recent version of CMake + - OpenSSL 1.0.2 or newer _or_ LibreSSL 3.0.0 or newer. + - JSON-C (may be provided by the user as shown below, or by the system) + - protobuf (Google Protocol Buffers) and protoc compiler + +## Preparing the source tree + +Certain features in Netdata require custom versions of specific libraries, +which the the build system will link statically into Netdata. These +libraries and their header files must be copied into specific locations +in the source tree to be used. + +Before you begin, make sure that your repo and the repo's submodules are clean from any previous builds and up to date. +Otherwise, [perform a cleanup](https://github.com/netdata/netdata/blob/master/packaging/installer/methods/manual.md#perform-a-cleanup-in-your-netdata-repo) + +### Netdata cloud + +#### JSON-C + +Netdata requires the use of JSON-C for JSON parsing when using Netdata +Cloud. Netdata is able to use a system-provided copy of JSON-C, but +some systems may not provide it. If your system does not provide JSON-C, +you can do the following to prepare a copy for the build system: + +1. Verify the tag that Netdata expects to be used by checking the contents + of `packaging/jsonc.version` in your Netdata sources. +2. Obtain the sources for that version by either: + - Navigating to https://github.com/json-c/json-c and downloading + and unpacking the source code archive for that release. + - Cloning the repository with `git` and checking out the required tag. +3. Prepare the JSON-C sources by running `cmake -DBUILD_SHARED_LIBS=OFF .` + in the JSON-C source directory. +4. Build JSON-C by running `make` in the JSON-C source directory. +5. In the Netdata source directory, create a directory called + `externaldeps/jsonc`. +6. Copy `libjson-c.a` from the JSON-C source directory to + `externaldeps/jsonc/libjson-c.a` in the Netdata source tree. +7. Copy all of the header files (`*.h`) from the JSON-C source directory + to `externaldeps/jsonc/json-c` in the Netdata source tree. + +## Building Netdata + +Once the source tree has been prepared, Netdata is ready to be configured +and built. Netdata currently uses GNU autotools as it's primary build +system. To build Netdata this way: + +1. Run `autoreconf -ivf` in the Netdata source tree. +2. Run `./configure` in the Netdata source tree. +3. Run `make` in the Netdata source tree. + +### Configure options + +Netdata provides a number of build time configure options. This section +lists some of the ones you are most likely to need: + +- `--prefix`: Specify the prefix under which Netdata will be installed. +- `--with-webdir`: Specify a path relative to the prefix in which to + install the web UI files. +- `--disable-cloud`: Disables all Netdata Cloud functionality for + this build. + +### Using Clang + +Netdata is primarily developed using GCC, but in most cases we also +build just fine using Clang. Under some build configurations of Clang +itself, you may see build failures with the linker reporting errors +about `nonrepresentable section on output`. We currently do not have a +conclusive fix for this issue (the obvious fix leads to other issues which +we haven't been able to fix yet), and unfortunately the only workaround +is to use a different build of Clang or to use GCC. + +### Linking errors relating to OpenSSL + +Netdata's build system currently does not reliably support building +on systems which have multiple ABI incompatible versions of OpenSSL +installed. In such situations, you may encounter linking errors due to +Netdata trying to build against headers for one version but link to a +different version. + +## Additional components + +A full featured install of Netdata requires some additional components +which must be built and installed separately from the main Netdata +agent. All of these should be handled _after_ installing Netdata itself. + +### React dashboard + +The above build steps include a deprecated web UI for Netdata that lacks +support for Netdata Cloud. To get a fully featured dashboard, you must +install our new React dashboard. + +#### Installing the pre-built React dashboard + +We provide pre-built archives of the React dashboard for each release +(these are also used during our normal install process). To use one +of these: + +1. Verify the release version that Netdata expects to be used by checking + the contents of `packaging/dashboard.version` in your Netdata sources. +2. Go to https://github.com/netdata/dashboard/releases and download the + `dashboard.tar.gz` file for the required release. +3. Unpack the downloaded archive to a temporary directory. +4. Copy the contents of the `build` directory from the extracted + archive to `/usr/share/netdata/web` or the equivalent location for + your build of Netdata. This _will_ overwrite some files in the target + location. + +#### Building the React dashboard locally + +Alternatively, you may wish to build the React dashboard locally. Doing +so requires a recent version of Node.JS with a working install of +NPM. Once you have the required tools, do the following: + +1. Verify the release version that Netdata expects to be used by checking + the contents of `packaging/dashboard.version` in your Netdata sources. +2. Obtain the sources for that version by either: + - Navigating to https://github.com/netdata/dashboard and downloading + and unpacking the source code archive for that release. + - Cloning the repository with `git` and checking out the required tag. +3. Run `npm install` in the dashboard source tree. +4. Run `npm run build` in the dashboard source tree. +5. Copy the contents of the `build` directory just like step 4 of + installing the pre-built React dashboard. + +### Go collectors + +A number of the collectors for Netdata are written in Go instead of C, +and are developed in a separate repository from the mian Netdata code. +An installation without these collectors is still usable, but will be +unable to collect metrics for a number of network services the system +may be providing. You can either install a pre-built copy of these +collectors, or build them locally. + +#### Installing the pre-built Go collectors + +We provide pre-built binaries of the Go collectors for all the platforms +we officially support. To use one of these: + +1. Verify the release version that Netdata expects to be used by checking + the contents of `packaging/go.d.version` in your Netdata sources. +2. Go to https://github.com/netdata/go.d.plugin/releases, select the + required release, and download the `go.d.plugin-*.tar.gz` file + for your system type and CPu architecture and the `config.tar.gz` + configuration file archive. +3. Extract the `go.d.plugin-*.tar.gz` archive into a temporary + location, and then copy the single file in the archive to + `/usr/libexec/netdata/plugins.d` or the equivalent location for your + build of Netdata and rename it to `go.d.plugin`. +4. Extract the `config.tar.gz` archive to a temporarylocation and then + copy the contents of the archive to `/etc/netdata` or the equivalent + location for your build of Netdata. + +#### Building the Go collectors locally + +Alternatively, you may wish to build the Go collectors locally +yourself. Doing so requires a working installation of Golang 1.13 or +newer. Once you have the required tools, do the following: + +1. Verify the release version that Netdata expects to be used by checking + the contents of `packaging/go.d.version` in your Netdata sources. +2. Obtain the sources for that version by either: + - Navigating to https://github.com/netdata/go.d.plugin and downloading + and unpacking the source code archive for that release. + - Cloning the repository with `git` and checking out the required tag. +3. Run `make` in the go.d.plugin source tree. +4. Copy `bin/godplugin` to `/usr/libexec/netdata/plugins.d` or th + equivalent location for your build of Netdata and rename it to + `go.d.plugin`. +5. Copy the contents of the `config` directory to `/etc/netdata` or the + equivalent location for your build of Netdata. + +### eBPF collector + +On Linux systems, Netdata has support for using the kernel's eBPF +interface to monitor performance-related VFS, network, and process events, +allowing for insights into process lifetimes and file access +patterns. Using this functionality requires additional code managed in +a separate repository from the core Netdata agent. You can either install +a pre-built copy of the required code, or build it locally. + +#### Installing the pre-built eBPF code + +We provide pre-built copies of the eBPF code for 64-bit x86 systems +using glibc or musl. To use one of these: + +1. Verify the release version that Netdata expects to be used by checking + the contents of `packaging/ebpf.version` in your Netdata sources. +2. Go to https://github.com/netdata/kernel-collector/releases, select the + required release, and download the `netdata-kernel-collector-*.tar.xz` + file for the libc variant your system uses (either rmusl or glibc). +3. Extract the contents of the archive to a temporary location, and then + copy all of the `.o` and `.so.*` files and the contents of the `library/` + directory to `/usr/libexec/netdata/plugins.d` or the equivalent location + for your build of Netdata. + +#### Building the eBPF code locally + +Alternatively, you may wish to build the eBPF code locally yourself. For +instructions, please consult [the README file for our kernel-collector +repository](https://github.com/netdata/kernel-collector/#readme), +which outlines both the required dependencies, as well as multiple +options for building the code. + + diff --git a/packaging/installer/methods/synology.md b/packaging/installer/methods/synology.md new file mode 100644 index 00000000..3910859b --- /dev/null +++ b/packaging/installer/methods/synology.md @@ -0,0 +1,64 @@ +<!-- +title: "Install Netdata on Synology" +description: "The Netdata Agent can be installed on AMD64-compatible NAS systems using the 64-bit pre-compiled static binary." +custom_edit_url: https://github.com/netdata/netdata/edit/master/packaging/installer/methods/synology.md +sidebar_label: "Synology" +learn_status: "Published" +learn_rel_path: "Installation/Install on specific environments" +--> + +# Install Netdata on Synology + +> 💡 This document is maintained by Netdata's community, and may not be completely up-to-date. Please double-check the +> details of the installation process, before proceeding. +> +> You can help improve this document by +> [submitting a PR](https://github.com/netdata/netdata/edit/master/packaging/installer/methods/synology.md) +> with your recommended improvements or changes. Thank you! + + +The good news is that our +[one-line installation script](https://github.com/netdata/netdata/blob/master/packaging/installer/methods/kickstart.md) +works fine if your NAS is one that uses the amd64 architecture. It +will install the content into `/opt/netdata`, making future removal safe and simple. + +## Run as netdata user + +When Netdata is first installed, it will run as _root_. This may or may not be acceptable for you, and since other +installations run it as the `netdata` user, you might wish to do the same. This requires some extra work: + +1. Create a group `netdata` via the Synology group interface. Give it no access to anything. +2. Create a user `netdata` via the Synology user interface. Give it no access to anything and a random password. Assign + the user to the `netdata` group. Netdata will chuid to this user when running. +3. Change ownership of the following directories, as defined in + [Netdata Security](https://github.com/netdata/netdata/blob/master/docs/netdata-security.md#security-design): + +```sh +chown -R root:netdata /opt/netdata/usr/share/netdata +chown -R netdata:netdata /opt/netdata/var/lib/netdata /opt/netdata/var/cache/netdata +chown -R netdata:root /opt/netdata/var/log/netdata +``` + +4. Restart Netdata + +```sh +/etc/rc.netdata restart +``` + +## Create startup script + +Additionally, as of 2018/06/24, the Netdata installer doesn't recognize DSM as an operating system, so no init script is +installed. You'll have to do this manually: + +1. Add [this file](https://gist.github.com/oskapt/055d474d7bfef32c49469c1b53e8225f) as `/etc/rc.netdata`. Make it + executable with `chmod 0755 /etc/rc.netdata`. +2. Add or edit `/etc/rc.local` and add a line calling `/etc/rc.netdata` to have it start on boot: + +```conf +# Netdata startup +[ -x /etc/rc.netdata ] && /etc/rc.netdata start +``` + +3. Make sure `/etc/rc.netdata` is executable: `chmod 0755 /etc/rc.netdata`. + + diff --git a/packaging/installer/methods/systems.md b/packaging/installer/methods/systems.md new file mode 100644 index 00000000..e53c4f4a --- /dev/null +++ b/packaging/installer/methods/systems.md @@ -0,0 +1,18 @@ +<!-- +title: "Install on specific environments" +description: "Netdata can be installed as a DEB/RPM package, a static binary, a docker container or from source" +custom_edit_url: https://github.com/netdata/netdata/edit/master/packaging/installer/methods/systems.md +sidebar_label: "Install on specific environments" +learn_status: "Published" +learn_rel_path: "Installation/Install on specific environments" +--> + +# Install on specific environments + +This category contains specific instructions for some popular environments. +If you have a standard environment that is not yet listed here, just use the +[one line installer kickstart.sh](https://github.com/netdata/netdata/blob/master/packaging/installer/methods/kickstart.md) + +If your environment is somewhat old or unusual, check our +[platform support policy](https://github.com/netdata/netdata/blob/master/packaging/PLATFORM_SUPPORT.md). + |