
diff options
Diffstat (limited to 'packaging/installer/methods')
| -rw-r--r-- | packaging/installer/methods/ansible.md | 156 | ||||
| -rw-r--r-- | packaging/installer/methods/aws.md (renamed from packaging/installer/methods/cloud-providers.md) | 79 | ||||
| -rw-r--r-- | packaging/installer/methods/azure.md | 68 | ||||
| -rw-r--r-- | packaging/installer/methods/freebsd.md | 113 | ||||
| -rw-r--r-- | packaging/installer/methods/freenas.md | 24 | ||||
| -rw-r--r-- | packaging/installer/methods/gcp.md | 70 | ||||
| -rw-r--r-- | packaging/installer/methods/kickstart.md | 101 | ||||
| -rw-r--r-- | packaging/installer/methods/kubernetes.md | 193 | ||||
| -rw-r--r-- | packaging/installer/methods/macos.md | 21 | ||||
| -rw-r--r-- | packaging/installer/methods/manual.md | 19 | ||||
| -rw-r--r-- | packaging/installer/methods/methods.md | 26 | ||||
| -rw-r--r-- | packaging/installer/methods/offline.md | 19 | ||||
| -rw-r--r-- | packaging/installer/methods/packages.md | 10 | ||||
| -rw-r--r-- | packaging/installer/methods/pfsense.md | 3 | ||||
| -rw-r--r-- | packaging/installer/methods/source.md | 6 | ||||
| -rw-r--r-- | packaging/installer/methods/synology.md | 11 | ||||
| -rw-r--r-- | packaging/installer/methods/systems.md | 18 |
17 files changed, 597 insertions, 340 deletions
diff --git a/packaging/installer/methods/ansible.md b/packaging/installer/methods/ansible.md new file mode 100644 index 000000000..6b4c69f09 --- /dev/null +++ b/packaging/installer/methods/ansible.md @@ -0,0 +1,156 @@ +<!-- +title: "Deploy Netdata with Ansible" +description: "Deploy an infrastructure monitoring solution in minutes with the Netdata Agent and Ansible. Use and customize a simple playbook for monitoring as code." +image: /img/seo/guides/deploy/ansible.png +custom_edit_url: https://github.com/netdata/netdata/edit/master/packaging/installer/methods/ansible.md +sidebar_label: "Ansible" +learn_status: "Published" +learn_rel_path: "Installation/Install on specific environments" +--> + +# Deploy Netdata with Ansible + +Netdata's [one-line kickstart](https://github.com/netdata/netdata/blob/master/packaging/installer/README.md#install-on-linux-with-one-line-installer) is zero-configuration, highly adaptable, and compatible with tons +of different operating systems and Linux distributions. You can use it on bare metal, VMs, containers, and everything +in-between. + +But what if you're trying to bootstrap an infrastructure monitoring solution as quickly as possible? What if you need to +deploy Netdata across an entire infrastructure with many nodes? What if you want to make this deployment reliable, +repeatable, and idempotent? What if you want to write and deploy your infrastructure or cloud monitoring system like +code? + +Enter [Ansible](https://ansible.com), a popular system provisioning, configuration management, and infrastructure as +code (IaC) tool. Ansible uses **playbooks** to glue many standardized operations together with a simple syntax, then run +those operations over standard and secure SSH connections. There's no agent to install on the remote system, so all you +have to worry about is your application and your monitoring software. + +Ansible has some competition from the likes of [Puppet](https://puppet.com/) or [Chef](https://www.chef.io/), but the +most valuable feature about Ansible is **idempotent**. From the [Ansible +glossary](https://docs.ansible.com/ansible/latest/reference_appendices/glossary.html) + +> An operation is idempotent if the result of performing it once is exactly the same as the result of performing it +> repeatedly without any intervening actions. + +Idempotency means you can run an Ansible playbook against your nodes any number of times without affecting how they +operate. When you deploy Netdata with Ansible, you're also deploying _monitoring as code_. + +In this guide, we'll walk through the process of using an [Ansible +playbook](https://github.com/netdata/community/tree/main/configuration-management/ansible-quickstart/) to automatically +deploy the Netdata Agent to any number of distributed nodes, manage the configuration of each node, and connect them to +your Netdata Cloud account. You'll go from some unmonitored nodes to a infrastructure monitoring solution in a matter of +minutes. + +## Prerequisites + +- A Netdata Cloud account. [Sign in and create one](https://app.netdata.cloud) if you don't have one already. +- An administration system with [Ansible](https://www.ansible.com/) installed. +- One or more nodes that your administration system can access via [SSH public + keys](https://git-scm.com/book/en/v2/Git-on-the-Server-Generating-Your-SSH-Public-Key) (preferably password-less). + +## Download and configure the playbook + +First, download the +[playbook](https://github.com/netdata/community/tree/main/configuration-management/ansible-quickstart/), move it to the +current directory, and remove the rest of the cloned repository, as it's not required for using the Ansible playbook. + +```bash +git clone https://github.com/netdata/community.git +mv community/netdata-agent-deployment/ansible-quickstart . +rm -rf community +``` + +Or if you don't want to clone the entire repository, use the [gitzip browser extension](https://gitzip.org/) to get the netdata-agent-deployment directory as a zip file. + +Next, `cd` into the Ansible directory. + +```bash +cd ansible-quickstart +``` + +### Edit the `hosts` file + +The `hosts` file contains a list of IP addresses or hostnames that Ansible will try to run the playbook against. The +`hosts` file that comes with the repository contains two example IP addresses, which you should replace according to the +IP address/hostname of your nodes. + +```conf +203.0.113.0 hostname=node-01 +203.0.113.1 hostname=node-02 +``` + +You can also set the `hostname` variable, which appears both on the local Agent dashboard and Netdata Cloud, or you can +omit the `hostname=` string entirely to use the system's default hostname. + +#### Set the login user (optional) + +If you SSH into your nodes as a user other than `root`, you need to configure `hosts` according to those user names. Use +the `ansible_user` variable to set the login user. For example: + +```conf +203.0.113.0 hostname=ansible-01 ansible_user=example +``` + +#### Set your SSH key (optional) + +If you use an SSH key other than `~/.ssh/id_rsa` for logging into your nodes, you can set that on a per-node basis in +the `hosts` file with the `ansible_ssh_private_key_file` variable. For example, to log into a Lightsail instance using +two different SSH keys supplied by AWS. + +```conf +203.0.113.0 hostname=ansible-01 ansible_ssh_private_key_file=~/.ssh/LightsailDefaultKey-us-west-2.pem +203.0.113.1 hostname=ansible-02 ansible_ssh_private_key_file=~/.ssh/LightsailDefaultKey-us-east-1.pem +``` + +### Edit the `vars/main.yml` file + +In order to connect your node(s) to your Space in Netdata Cloud, and see all their metrics in real-time in [composite +charts](https://github.com/netdata/netdata/blob/master/docs/visualize/overview-infrastructure.md) or perform [Metric +Correlations](https://github.com/netdata/netdata/blob/master/docs/cloud/insights/metric-correlations.md), you need to set the `claim_token` +and `claim_room` variables. + +To find your `claim_token` and `claim_room`, go to Netdata Cloud, then click on your Space's name in the top navigation, +then click on **Manage your Space**. Click on the **Nodes** tab in the panel that appears, which displays a script with +`token` and `room` strings. + + + +Copy those strings into the `claim_token` and `claim_rooms` variables. + +```yml +claim_token: XXXXX +claim_rooms: XXXXX +``` + +Change the `dbengine_multihost_disk_space` if you want to change the metrics retention policy by allocating more or less +disk space for storing metrics. The default is 2048 Mib, or 2 GiB. + +Because we're connecting this node to Netdata Cloud, and will view its dashboards there instead of via the IP address or +hostname of the node, the playbook disables that local dashboard by setting `web_mode` to `none`. This gives a small +security boost by not allowing any unwanted access to the local dashboard. + +You can read more about this decision, or other ways you might lock down the local dashboard, in our [node security +doc](https://github.com/netdata/netdata/blob/master/docs/netdata-security.md). + +> Curious about why Netdata's dashboard is open by default? Read our [blog +> post](https://www.netdata.cloud/blog/netdata-agent-dashboard/) on that zero-configuration design decision. + +## Run the playbook + +Time to run the playbook from your administration system: + +```bash +ansible-playbook -i hosts tasks/main.yml +``` + +Ansible first connects to your node(s) via SSH, then [collects +facts](https://docs.ansible.com/ansible/latest/user_guide/playbooks_vars_facts.html#ansible-facts) about the system. +This playbook doesn't use these facts, but you could expand it to provision specific types of systems based on the +makeup of your infrastructure. + +Next, Ansible makes changes to each node according to the `tasks` defined in the playbook, and +[returns](https://docs.ansible.com/ansible/latest/reference_appendices/common_return_values.html#changed) whether each +task results in a changed, failure, or was skipped entirely. + +The task to install Netdata will take a few minutes per node, so be patient! Once the playbook reaches the connect to Cloud +task, your nodes start populating your Space in Netdata Cloud. diff --git a/packaging/installer/methods/cloud-providers.md b/packaging/installer/methods/aws.md index 6b8fa6de1..c0b92a036 100644 --- a/packaging/installer/methods/cloud-providers.md +++ b/packaging/installer/methods/aws.md @@ -1,40 +1,28 @@ <!-- -title: "Install Netdata on cloud providers" +title: "Install Netdata on AWS" description: "The Netdata Agent runs on all popular cloud providers, but often requires additional steps and configuration for full functionality." -custom_edit_url: https://github.com/netdata/netdata/edit/master/packaging/installer/methods/cloud-providers.md +custom_edit_url: https://github.com/netdata/netdata/edit/master/packaging/installer/methods/aws.md +sidebar_label: "AWS" +learn_status: "Published" +learn_rel_path: "Installation/Install on specific environments" --> -# Install Netdata on cloud providers +# Install Netdata on AWS -Netdata is fully compatible with popular cloud providers like Google Cloud Platform (GCP), Amazon Web Services (AWS), -Azure, and others. You can install Netdata on cloud instances to monitor the apps/services running there, or use +Netdata is fully compatible with Amazon Web Services (AWS). +You can install Netdata on cloud instances to monitor the apps/services running there, or use multiple instances in a [parent-child streaming](https://github.com/netdata/netdata/blob/master/streaming/README.md) configuration. -In some cases, using Netdata on these cloud providers requires unique installation or configuration steps. This page -aims to document some of those steps for popular cloud providers. - -> This document is a work-in-progress! If you find new issues specific to a cloud provider, or would like to help -> clarify the correct workaround, please [create an -> issue](https://github.com/netdata/netdata/issues/new?labels=feature+request,+needs+triage&template=feature_request.md) -> with your process and instructions on using the provider's interface to complete the workaround. - -- [Recommended installation methods for cloud providers](#recommended-installation-methods-for-cloud-providers) -- [Post-installation configuration](#post-installation-configuration) - - [Add a firewall rule to access Netdata's dashboard](#add-a-firewall-rule-to-access-netdatas-dashboard) - -## Recommended installation methods for cloud providers +## Recommended installation method The best installation method depends on the instance's operating system, distribution, and version. For Linux instances, -we recommend the [`kickstart.sh` automatic installation script](kickstart.md). +we recommend the [`kickstart.sh` automatic installation script](https://github.com/netdata/netdata/blob/master/packaging/installer/methods/kickstart.md). If you have issues with Netdata after installation, look to the sections below to find the issue you're experiencing, followed by the solution for your provider. ## Post-installation configuration -Some cloud providers require you take additional steps to properly configure your instance or its networking to access -all of Netdata's features. - ### Add a firewall rule to access Netdata's dashboard If you cannot access Netdata's dashboard on your cloud instance via `http://HOST:19999`, and instead get an error page @@ -59,31 +47,6 @@ Another option is to put Netdata behind web server, which will proxy requests th - [HAProxy](https://github.com/netdata/netdata/blob/master/docs/Running-behind-haproxy.md) - [lighttpd](https://github.com/netdata/netdata/blob/master/docs/Running-behind-lighttpd.md) -The next few sections outline how to add firewall rules to GCP, AWS, and Azure instances. - -#### Google Cloud Platform (GCP) - -To add a firewall rule, go to the [Firewall rules page](https://console.cloud.google.com/networking/firewalls/list) and -click **Create firewall rule**. - -The following configuration has previously worked for Netdata running on GCP instances -([see #7786](https://github.com/netdata/netdata/issues/7786)): - -```conf -Name: <name> -Type: Ingress -Targets: <name-tag> -Filters: 0.0.0.0/0 -Protocols/ports: 19999 -Action: allow -Priority: 1000 -``` - -Read GCP's [firewall documentation](https://cloud.google.com/vpc/docs/using-firewalls) for specific instructions on how -to create a new firewall rule. - -#### Amazon Web Services (AWS) / EC2 - Sign in to the [AWS console](https://console.aws.amazon.com/) and navigate to the EC2 dashboard. Click on the **Security Groups** link in the navigation, beneath the **Network & Security** heading. Find the Security Group your instance belongs to, and either right-click on it or click the **Actions** button above to see a dropdown menu with **Edit @@ -102,25 +65,3 @@ Description: Netdata You can also choose **My IP** as the source if you prefer. Click **Save** to apply your new inbound firewall rule. - -#### Azure - -Sign in to the [Azure portal](https://portal.azure.com) and open the virtual machine running Netdata. Click on the -**Networking** link beneath the **Settings** header, then click on the **Add inbound security rule** button. - -Add a new rule with the following options: - -```conf -Source: Any -Source port ranges: 19999 -Destination: Any -Destination port ranges: 19999 -Protocol: TCP -Action: Allow -Priority: 310 -Name: Netdata -``` - -Click **Add** to apply your new inbound security rule. - - diff --git a/packaging/installer/methods/azure.md b/packaging/installer/methods/azure.md new file mode 100644 index 000000000..4c39a00ad --- /dev/null +++ b/packaging/installer/methods/azure.md @@ -0,0 +1,68 @@ +<!-- +title: "Install Netdata on Azure" +description: "The Netdata Agent runs on all popular cloud providers, but often requires additional steps and configuration for full functionality." +custom_edit_url: https://github.com/netdata/netdata/edit/master/packaging/installer/methods/azure.md +sidebar_label: "Azure" +learn_status: "Published" +learn_rel_path: "Installation/Install on specific environments" +--> + +# Install Netdata on Azure + +Netdata is fully compatible with Azure. +You can install Netdata on cloud instances to monitor the apps/services running there, or use +multiple instances in a [parent-child streaming](https://github.com/netdata/netdata/blob/master/streaming/README.md) configuration. + +## Recommended installation method + +The best installation method depends on the instance's operating system, distribution, and version. For Linux instances, +we recommend the [`kickstart.sh` automatic installation script](https://github.com/netdata/netdata/blob/master/packaging/installer/methods/kickstart.md). + +If you have issues with Netdata after installation, look to the sections below to find the issue you're experiencing, +followed by the solution for your provider. + +## Post-installation configuration + +### Add a firewall rule to access Netdata's dashboard + +If you cannot access Netdata's dashboard on your cloud instance via `http://HOST:19999`, and instead get an error page +from your browser that says, "This site can't be reached" (Chrome) or "Unable to connect" (Firefox), you may need to +configure your cloud provider's firewall. + +Cloud providers often create network-level firewalls that run separately from the instance itself. Both AWS and Google +Cloud Platform calls them Virtual Private Cloud (VPC) networks. These firewalls can apply even if you've disabled +firewalls on the instance itself. Because you can modify these firewalls only via the cloud provider's web interface, +it's easy to overlook them when trying to configure and access Netdata's dashboard. + +You can often confirm a firewall issue by querying the dashboard while connected to the instance via SSH: `curl +http://localhost:19999/api/v1/info`. If you see JSON output, Netdata is running properly. If you try the same `curl` +command from a remote system, and it fails, it's likely that a firewall is blocking your requests. + +Another option is to put Netdata behind web server, which will proxy requests through standard HTTP/HTTPS ports +(80/443), which are likely already open on your instance. We have a number of guides available: + +- [Apache](https://github.com/netdata/netdata/blob/master/docs/Running-behind-apache.md) +- [Nginx](https://github.com/netdata/netdata/blob/master/docs/Running-behind-nginx.md) +- [Caddy](https://github.com/netdata/netdata/blob/master/docs/Running-behind-caddy.md) +- [HAProxy](https://github.com/netdata/netdata/blob/master/docs/Running-behind-haproxy.md) +- [lighttpd](https://github.com/netdata/netdata/blob/master/docs/Running-behind-lighttpd.md) + +Sign in to the [Azure portal](https://portal.azure.com) and open the virtual machine running Netdata. Click on the +**Networking** link beneath the **Settings** header, then click on the **Add inbound security rule** button. + +Add a new rule with the following options: + +```conf +Source: Any +Source port ranges: 19999 +Destination: Any +Destination port ranges: 19999 +Protocol: TCP +Action: Allow +Priority: 310 +Name: Netdata +``` + +Click **Add** to apply your new inbound security rule. + + diff --git a/packaging/installer/methods/freebsd.md b/packaging/installer/methods/freebsd.md index ea7099b36..21670cdc9 100644 --- a/packaging/installer/methods/freebsd.md +++ b/packaging/installer/methods/freebsd.md @@ -2,6 +2,9 @@ title: "Install Netdata on FreeBSD" description: "Install Netdata on FreeBSD to monitor the health and performance of bare metal or VMs with thousands of real-time, per-second metrics." custom_edit_url: https://github.com/netdata/netdata/edit/master/packaging/installer/methods/freebsd.md +sidebar_label: "FreeBSD" +learn_status: "Published" +learn_rel_path: "Installation/Install on specific environments" --> # Install Netdata on FreeBSD @@ -13,20 +16,41 @@ custom_edit_url: https://github.com/netdata/netdata/edit/master/packaging/instal > PR](https://github.com/netdata/netdata/edit/master/packaging/installer/methods/freebsd.md) with your recommended > improvements or changes. Thank you! -## Install latest version +## Install dependencies -This is how to install the latest Netdata version on FreeBSD: - -Install required packages (**need root permission**): +This step needs root privileges. ```sh pkg install bash e2fsprogs-libuuid git curl autoconf automake pkgconf pidof liblz4 libuv json-c cmake gmake ``` +Please respond in the affirmative for any relevant prompts during the installation process. + +## Install Netdata + +The simplest method is to use the single line [kickstart script](https://learn.netdata.cloud/docs/agent/packaging/installer/methods/kickstart) + +If you have a Netdata cloud account then clicking on the **Connect Nodes** button will generate the kickstart command you should use. Use the command from the "Linux" tab, it should look something like this: + +```sh +wget -O /tmp/netdata-kickstart.sh https://my-netdata.io/kickstart.sh && sh /tmp/netdata-kickstart.sh --claim-token <CLAIM_TOKEN> --claim-url https://app.netdata.cloud +``` +Please respond in the affirmative for any relevant prompts during the installation process. + +Once the installation is completed, you should be able to start monitoring the FreeBSD server using Netdata. + + + +Netdata can also be installed via [FreeBSD ports](https://www.freshports.org/net-mgmt/netdata). + +## Manual installation + +If you would prefer to manually install Netdata, the following steps can help you do this. + Download Netdata: ```sh -fetch https://github.com/netdata/netdata/releases/download/v1.26.0/netdata-v1.26.0.tar.gz +fetch https://github.com/netdata/netdata/releases/download/v1.36.1/netdata-v1.36.1.tar.gz ``` > ⚠️ Verify the latest version by either navigating to [Netdata's latest @@ -73,35 +97,52 @@ If you have not passed the `--auto-update` or `-u` parameter for the installer t The `netdata-updater.sh` script will update your Agent. ## Optional parameters to alter your installation -| parameters | Description | -|:-----:|-----------| -|`--install-prefix <path>`| Install netdata in `<path>.` Ex: `--install-prefix /opt` will put netdata in `/opt/netdata`| -| `--dont-start-it` | Do not (re)start netdata after installation| -| `--dont-wait` | Run installation in non-interactive mode| -| `--auto-update` or `-u` | Install netdata-updater in cron to update netdata automatically once per day| -| `--stable-channel` | Use packages from GitHub release pages instead of GCS (nightly updates). This results in less frequent updates| -| `--nightly-channel` | Use most recent nightly updates instead of GitHub releases. This results in more frequent updates| -| `--disable-go` | Disable installation of go.d.plugin| -| `--disable-ebpf` | Disable eBPF Kernel plugin (Default: enabled)| -| `--disable-cloud` | Disable all Netdata Cloud functionality| -| `--require-cloud` | Fail the install if it can't build Netdata Cloud support| -| `--enable-plugin-freeipmi` | Enable the FreeIPMI plugin. Default: enable it when libipmimonitoring is available| -| `--disable-plugin-freeipmi` | Enable the FreeIPMI plugin| -| `--disable-https` | Explicitly disable TLS support| -| `--disable-dbengine` | Explicitly disable DB engine support| -| `--enable-plugin-nfacct` | Enable nfacct plugin. Default: enable it when libmnl and libnetfilter_acct are available| -| `--disable-plugin-nfacct` | Disable nfacct plugin. Default: enable it when libmnl and libnetfilter_acct are available| -| `--enable-plugin-xenstat` | Enable the xenstat plugin. Default: enable it when libxenstat and libyajl are available| -| `--disable-plugin-xenstat` | Disable the xenstat plugin| -| `--disable-exporting-kinesis` | Disable AWS Kinesis exporting connector. Default: enable it when libaws_cpp_sdk_kinesis and libraries (it depends on are available)| -| `--enable-exporting-prometheus-remote-write` | Enable Prometheus remote write exporting connector. Default: enable it when libprotobuf and libsnappy are available| -| `--disable-exporting-prometheus-remote-write` | Disable Prometheus remote write exporting connector. Default: enable it when libprotobuf and libsnappy are available| -| `--enable-exporting-mongodb` | Enable MongoDB exporting connector. Default: enable it when libmongoc is available| -| `--disable-exporting-mongodb` | Disable MongoDB exporting connector| -| `--enable-lto` | Enable Link-Time-Optimization. Default: enabled| -| `--disable-lto` | Disable Link-Time-Optimization. Default: enabled| -| `--disable-x86-sse` | Disable SSE instructions. By default SSE optimizations are enabled| -| `--zlib-is-really-here` or `--libs-are-really-here` | If you get errors about missing zlib or libuuid but you know it is available, you might have a broken pkg-config. Use this option to proceed without checking pkg-config| -|`--disable-telemetry` | Use this flag to opt-out from our anonymous telemetry program. (DISABLE_TELEMETRY=1)| - +The `kickstart.sh` script accepts a number of optional parameters to control how the installation process works: + +- `--non-interactive`: Don’t prompt for anything and assume yes whenever possible, overriding any automatic detection of an interactive run. +- `--interactive`: Act as if running interactively, even if automatic detection indicates a run is non-interactive. +- `--dont-wait`: Synonym for `--non-interactive` +- `--dry-run`: Show what the installer would do, but don’t actually do any of it. +- `--dont-start-it`: Don’t auto-start the daemon after installing. This parameter is not guaranteed to work. +- `--release-channel`: Specify a particular release channel to install from. Currently supported release channels are: + - `nightly`: Installs a nightly build (this is currently the default). + - `stable`: Installs a stable release. + - `default`: Explicitly request whatever the current default is. +- `--nightly-channel`: Synonym for `--release-channel nightly`. +- `--stable-channel`: Synonym for `--release-channel stable`. +- `--auto-update`: Enable automatic updates (this is the default). +- `--no-updates`: Disable automatic updates. +- `--disable-telemetry`: Disable anonymous statistics. +- `--native-only`: Only install if native binary packages are available. +- `--static-only`: Only install if a static build is available. +- `--build-only`: Only install using a local build. +- `--disable-cloud`: For local builds, don’t build any of the cloud code at all. For native packages and static builds, + use runtime configuration to disable cloud support. +- `--require-cloud`: Only install if Netdata Cloud can be enabled. Overrides `--disable-cloud`. +- `--install-prefix`: Specify an installation prefix for local builds (by default, we use a sane prefix based on the type of system). +- `--install-version`: Specify the version of Netdata to install. +- `--old-install-prefix`: Specify the custom local build's installation prefix that should be removed. +- `--local-build-options`: Specify additional options to pass to the installer code when building locally. Only valid if `--build-only` is also specified. +- `--static-install-options`: Specify additional options to pass to the static installer code. Only valid if --static-only is also specified. + +The following options are mutually exclusive and specifiy special operations other than trying to install Netdata normally or update an existing install: + +- `--reinstall`: If there is an existing install, reinstall it instead of trying to update it. If there is not an existing install, install netdata normally. +- `--reinstall-even-if-unsafe`: If there is an existing install, reinstall it instead of trying to update it, even if doing so is known to potentially break things (for example, if we cannot detect what tyep of installation it is). If there is not an existing install, install Netdata normally. +- `--reinstall-clean`: If there is an existing install, uninstall it before trying to install Netdata. Fails if there is no existing install. +- `--uninstall`: Uninstall an existing installation of Netdata. Fails if there is no existing install. +- `--claim-only`: If there is an existing install, only try to claim it without attempting to update it. If there is no existing install, install and claim Netdata normally. +- `--repositories-only`: Only install repository configuration packages instead of doing a full install of Netdata. Automatically sets --native-only. +- `--prepare-offline-install-source`: Instead of insallling the agent, prepare a directory that can be used to install on another system without needing to download anything. See our [offline installation documentation](https://github.com/netdata/netdata/blob/master/packaging/installer/methods/offline.md) for more info. + +Additionally, the following environment variables may be used to further customize how the script runs (most users +should not need to use special values for any of these): + +- `TMPDIR`: Used to specify where to put temporary files. On most systems, the default we select automatically + should be fine. The user running the script needs to both be able to write files to the temporary directory, + and run files from that location. +- `ROOTCMD`: Used to specify a command to use to run another command with root privileges if needed. By default + we try to use sudo, doas, or pkexec (in that order of preference), but if you need special options for one of + those to work, or have a different tool to do the same thing on your system, you can specify it here. +- `DISABLE_TELEMETRY`: If set to a value other than 0, behave as if `--disable-telemetry` was specified. diff --git a/packaging/installer/methods/freenas.md b/packaging/installer/methods/freenas.md deleted file mode 100644 index a69f1e3fb..000000000 --- a/packaging/installer/methods/freenas.md +++ /dev/null @@ -1,24 +0,0 @@ -<!-- -title: "Install Netdata on FreeNAS" -custom_edit_url: https://github.com/netdata/netdata/edit/master/packaging/installer/methods/freenas.md ---> - -# Install Netdata on FreeNAS - -On FreeNAS-Corral-RELEASE (>=10.0.3 and <11.3), Netdata is pre-installed. - -To use Netdata, the service will need to be enabled and started from the FreeNAS [CLI](https://github.com/freenas/cli). - -To enable the Netdata service: - -```sh -service netdata config set enable=true -``` - -To start the Netdata service: - -```sh -service netdata start -``` - - diff --git a/packaging/installer/methods/gcp.md b/packaging/installer/methods/gcp.md new file mode 100644 index 000000000..0b16b1096 --- /dev/null +++ b/packaging/installer/methods/gcp.md @@ -0,0 +1,70 @@ +<!-- +title: "Install Netdata on GCP" +description: "The Netdata Agent runs on all popular cloud providers, but often requires additional steps and configuration for full functionality." +custom_edit_url: https://github.com/netdata/netdata/edit/master/packaging/installer/methods/gcp.md +sidebar_label: "GCP" +learn_status: "Published" +learn_topic_type: "Tasks" +learn_rel_path: "Installation/Install on specific environments" +--> + +# Install Netdata on GCP + +Netdata is fully compatible with the Google Cloud Platform (GCP). +You can install Netdata on cloud instances to monitor the apps/services running there, or use +multiple instances in a [parent-child streaming](https://github.com/netdata/netdata/blob/master/streaming/README.md) configuration. + +## Recommended installation method + +The best installation method depends on the instance's operating system, distribution, and version. For Linux instances, +we recommend the [`kickstart.sh` automatic installation script](https://github.com/netdata/netdata/blob/master/packaging/installer/methods/kickstart.md). + +If you have issues with Netdata after installation, look to the sections below to find the issue you're experiencing, +followed by the solution for your provider. + +## Post-installation configuration + +### Add a firewall rule to access Netdata's dashboard + +If you cannot access Netdata's dashboard on your cloud instance via `http://HOST:19999`, and instead get an error page +from your browser that says, "This site can't be reached" (Chrome) or "Unable to connect" (Firefox), you may need to +configure your cloud provider's firewall. + +Cloud providers often create network-level firewalls that run separately from the instance itself. Both AWS and Google +Cloud Platform calls them Virtual Private Cloud (VPC) networks. These firewalls can apply even if you've disabled +firewalls on the instance itself. Because you can modify these firewalls only via the cloud provider's web interface, +it's easy to overlook them when trying to configure and access Netdata's dashboard. + +You can often confirm a firewall issue by querying the dashboard while connected to the instance via SSH: `curl +http://localhost:19999/api/v1/info`. If you see JSON output, Netdata is running properly. If you try the same `curl` +command from a remote system, and it fails, it's likely that a firewall is blocking your requests. + +Another option is to put Netdata behind web server, which will proxy requests through standard HTTP/HTTPS ports +(80/443), which are likely already open on your instance. We have a number of guides available: + +- [Apache](https://github.com/netdata/netdata/blob/master/docs/Running-behind-apache.md) +- [Nginx](https://github.com/netdata/netdata/blob/master/docs/Running-behind-nginx.md) +- [Caddy](https://github.com/netdata/netdata/blob/master/docs/Running-behind-caddy.md) +- [HAProxy](https://github.com/netdata/netdata/blob/master/docs/Running-behind-haproxy.md) +- [lighttpd](https://github.com/netdata/netdata/blob/master/docs/Running-behind-lighttpd.md) + + +To add a firewall rule, go to the [Firewall rules page](https://console.cloud.google.com/networking/firewalls/list) and +click **Create firewall rule**. + +The following configuration has previously worked for Netdata running on GCP instances +([see #7786](https://github.com/netdata/netdata/issues/7786)): + +```conf +Name: <name> +Type: Ingress +Targets: <name-tag> +Filters: 0.0.0.0/0 +Protocols/ports: 19999 +Action: allow +Priority: 1000 +``` + +Read GCP's [firewall documentation](https://cloud.google.com/vpc/docs/using-firewalls) for specific instructions on how +to create a new firewall rule. + diff --git a/packaging/installer/methods/kickstart.md b/packaging/installer/methods/kickstart.md index 7c1f60d19..374ac594a 100644 --- a/packaging/installer/methods/kickstart.md +++ b/packaging/installer/methods/kickstart.md @@ -2,12 +2,16 @@ title: "Install Netdata with kickstart.sh" description: "The kickstart.sh script installs Netdata from source, including all dependencies required to connect to Netdata Cloud, with a single command." custom_edit_url: "https://github.com/netdata/netdata/edit/master/packaging/installer/methods/kickstart.md" -sidebar_label: "Install Netdata with kickstart.sh" +sidebar_label: "One line installer (kickstart.sh)" learn_status: "Published" -learn_topic_type: "Tasks" -learn_rel_path: "Installation" +learn_rel_path: "Installation/Installation methods" +sidebar_position: 10 --> + import { OneLineInstallWget, OneLineInstallCurl } from '@site/src/components/OneLineInstall/' +import { Install, InstallBox } from '@site/src/components/Install/' +import Tabs from '@theme/Tabs'; +import TabItem from '@theme/TabItem'; # Install Netdata with kickstart.sh @@ -18,17 +22,32 @@ This page covers detailed instructions on using and configuring the automatic on The kickstart script works on all Linux distributions and macOS environments. By default, automatic nightly updates are enabled. If you are installing on macOS, make sure to check the [install documentation for macOS](https://github.com/netdata/netdata/blob/master/packaging/installer/methods/macos.md) before continuing. -> If you are unsure whether you want nightly or stable releases, read the [installation guide](https://github.com/netdata/netdata/blob/master/packaging/installer/README.md#nightly-vs-stable-releases). + +> :bulb: Tip +> +> If you are unsure whether you want nightly or stable releases, read the [installation guide](https://github.com/netdata/netdata/blob/master/packaging/installer/README.md#nightly-vs-stable-releases). + > If you want to turn off [automatic updates](https://github.com/netdata/netdata/blob/master/packaging/installer/README.md#automatic-updates), use the `--no-updates` option. You can find more installation options below. To install Netdata, run the following as your normal user: -<OneLineInstallWget/> +<Tabs> + <TabItem value="wget" label="wget"> + + <OneLineInstallWget/> + + </TabItem> + <TabItem value="curl" label="curl"> -Or, if you have cURL but not wget (such as on macOS): + <OneLineInstallCurl/> -<OneLineInstallCurl/> + </TabItem> +</Tabs> +> :bookmark_tabs: Note +> +> If you plan to also connect the node to Netdata Cloud, make sure to replace `YOUR_CLAIM_TOKEN` with the claim token of your space, +> and `YOUR_ROOM_ID` with the ID of the room you are willing to connect the node to. ## What does `kickstart.sh` do? @@ -39,7 +58,7 @@ The `kickstart.sh` script does the following after being downloaded and run usin - Attempts to install Netdata using our [official native binary packages](#native-packages). - If there are no official native binary packages for your system (or installing that way failed), tries to install using a [static build of Netdata](#static-builds) if one is available. -- If no static build is available, installs required dependencies and then attempts to install by +- If no static build is available, installs required dependencies and then attempts to install by [building Netdata locally](#local-builds) (by downloading the sources and building them directly). - Installs `netdata-updater.sh` to `cron.daily`, so your Netdata installation will be updated with new nightly versions, unless you override that with an [optional parameter](#optional-parameters-to-alter-your-installation). @@ -55,30 +74,41 @@ The `kickstart.sh` script accepts a number of optional parameters to control how - `--dry-run`: Show what the installer would do, but don’t actually do any of it. - `--dont-start-it`: Don’t auto-start the daemon after installing. This parameter is not guaranteed to work. - `--release-channel`: Specify a particular release channel to install from. Currently supported release channels are: - - `nightly`: Installs a nightly build (this is currently the default). - - `stable`: Installs a stable release. - - `default`: Explicitly request whatever the current default is. + - `nightly`: Installs a nightly build (this is currently the default). + - `stable`: Installs a stable release. + - `default`: Explicitly request whatever the current default is. - `--nightly-channel`: Synonym for `--release-channel nightly`. - `--stable-channel`: Synonym for `--release-channel stable`. - `--auto-update`: Enable automatic updates (this is the default). - `--no-updates`: Disable automatic updates. - `--disable-telemetry`: Disable anonymous statistics. -- `--repositories-only`: Only install appropriate repository configuration packages (only for native install). - `--native-only`: Only install if native binary packages are available. - `--static-only`: Only install if a static build is available. - `--build-only`: Only install using a local build. -- `--reinstall`: If an existing install is found, reinstall instead of trying to update it in place. -- `--reinstall-even-if-unsafe`: Even try to reinstall if we don't think we can do so safely (implies `--reinstall`). - `--disable-cloud`: For local builds, don’t build any of the cloud code at all. For native packages and static builds, use runtime configuration to disable cloud support. - `--require-cloud`: Only install if Netdata Cloud can be enabled. Overrides `--disable-cloud`. - `--install-prefix`: Specify an installation prefix for local builds (by default, we use a sane prefix based on the type of system). - `--install-version`: Specify the version of Netdata to install. - `--old-install-prefix`: Specify the custom local build's installation prefix that should be removed. -- `--uninstall`: Uninstall an existing installation of Netdata. -- `--reinstall-clean`: Performs an uninstall of Netdata and clean installation. - `--local-build-options`: Specify additional options to pass to the installer code when building locally. Only valid if `--build-only` is also specified. - `--static-install-options`: Specify additional options to pass to the static installer code. Only valid if --static-only is also specified. +- `--claim-token`: Specify a unique claiming token associated with your Space in Netdata Cloud to be used to connect to the node + after the install. +- `--claim-rooms`: Specify a comma-separated list of tokens for each War Room this node should appear in. +- `--claim-proxy`: Specify a proxy to use when connecting to the cloud in the form of `http://[user:pass@]host:ip` for an HTTP(S) proxy. + See [connecting through a proxy](https://github.com/netdata/netdata/blob/master/claim/README.md#connect-through-a-proxy) for details. +- `--claim-url`: Specify a URL to use when connecting to the cloud. Defaults to `https://api.netdata.cloud`. +- `--override-distro`: Override the distro detection logic and assume the system is using a specific Linux distribution and release. Takes a single argument consisting of the values of the `ID`, `VERSION_ID`, and `VERSION_CODENAME` fields from `/etc/os-release` for the desired distribution. + +The following options are mutually exclusive and specifiy special operations other than trying to install Netdata normally or update an existing install: + +- `--reinstall`: If there is an existing install, reinstall it instead of trying to update it. If there is not an existing install, install netdata normally. +- `--reinstall-even-if-unsafe`: If there is an existing install, reinstall it instead of trying to update it, even if doing so is known to potentially break things (for example, if we cannot detect what tyep of installation it is). If there is not an existing install, install Netdata normally. +- `--reinstall-clean`: If there is an existing install, uninstall it before trying to install Netdata. Fails if there is no existing install. +- `--uninstall`: Uninstall an existing installation of Netdata. Fails if there is no existing install. +- `--claim-only`: If there is an existing install, only try to claim it without attempting to update it. If there is no existing install, install and claim Netdata normally. +- `--repositories-only`: Only install repository configuration packages instead of doing a full install of Netdata. Automatically sets --native-only. - `--prepare-offline-install-source`: Instead of insallling the agent, prepare a directory that can be used to install on another system without needing to download anything. See our [offline installation documentation](https://github.com/netdata/netdata/blob/master/packaging/installer/methods/offline.md) for more info. Additionally, the following environment variables may be used to further customize how the script runs (most users @@ -92,31 +122,6 @@ should not need to use special values for any of these): those to work, or have a different tool to do the same thing on your system, you can specify it here. - `DISABLE_TELEMETRY`: If set to a value other than 0, behave as if `--disable-telemetry` was specified. -### Connect node to Netdata Cloud during installation - -The `kickstart.sh` script accepts additional parameters to automatically [connect](https://github.com/netdata/netdata/blob/master/claim/README.md) your node to Netdata Cloud immediately after installation. - -> Note: You either need to run the command with root privileges or run it with the user that is running the agent. More details: [Connect an agent without root privileges](https://github.com/netdata/netdata/blob/master/claim/README.md#connect-an-agent-without-root-privileges) section. - -To automatically claim nodes after installation: - -1. Sign in to [Netdata Cloud](https://app.netdata.cloud/sign-in?cloudRoute=/spaces) -2. Go to the [Spaces management area](https://learn.netdata.cloud/docs/cloud/spaces#manage-spaces) -3. Click on **Connect Nodes** -4. Find the `token` and `rooms` strings and specify your nodes: - -- `--claim-token`: Specify a unique claiming token associated with your Space in Netdata Cloud to be used to connect to the node - after the install. -- `--claim-rooms`: Specify a comma-separated list of tokens for each War Room this node should appear in. -- `--claim-proxy`: Specify a proxy to use when connecting to the cloud in the form of `http://[user:pass@]host:ip` for an HTTP(S) proxy. - See [connecting through a proxy](https://github.com/netdata/netdata/blob/master/claim/README.md#connect-through-a-proxy) for details. -- `--claim-url`: Specify a URL to use when connecting to the cloud. Defaults to `https://api.netdata.cloud`. - -For example: - -```bash -wget -O /tmp/netdata-kickstart.sh https://my-netdata.io/kickstart.sh && sh /tmp/netdata-kickstart.sh --claim-token TOKEN --claim-rooms ROOM1,ROOM2 -``` ### Native packages @@ -149,7 +154,6 @@ If you want to enforce the usage of a local build (perhaps because you require a which is not supported with native packages or static builds), you can do so by adding `--build-only` to the options you pass to the installer. - ## Verify script integrity To use `md5sum` to verify the integrity of the `kickstart.sh` script you will download using the one-line command above, @@ -160,16 +164,3 @@ run the following: ``` If the script is valid, this command will return `OK, VALID`. - -## What's next? - -When you're finished with installation, check out our [single-node](https://github.com/netdata/netdata/blob/master/docs/quickstart/single-node.md) or -[infrastructure](https://github.com/netdata/netdata/blob/master/docs/quickstart/infrastructure.md) monitoring quickstart guides based on your use case. - -Or, skip straight to [configuring the Netdata Agent](https://github.com/netdata/netdata/blob/master/docs/configure/nodes.md). - -Read through Netdata's [documentation](https://learn.netdata.cloud/docs), which is structured based on actions and -solutions, to enable features like health monitoring, alarm notifications, long-term metrics storage, exporting to -external databases, and more. - - diff --git a/packaging/installer/methods/kubernetes.md b/packaging/installer/methods/kubernetes.md index 142c098b4..4dde3f407 100644 --- a/packaging/installer/methods/kubernetes.md +++ b/packaging/installer/methods/kubernetes.md @@ -1,112 +1,122 @@ -<!-- -title: "Deploy Kubernetes monitoring with Netdata" -description: "Deploy Netdata to monitor a Kubernetes cluster to monitor the health, performance, resource utilization, and application metrics of a Kubernetes cluster in real time." -custom_edit_url: "https://github.com/netdata/netdata/edit/master/packaging/installer/methods/kubernetes.md" -sidebar_label: "Deploy Kubernetes monitoring with Netdata" -learn_status: "Published" -learn_topic_type: "Tasks" -learn_rel_path: "Installation" ---> - -# Deploy Kubernetes monitoring with Netdata - -This document details how to install Netdata on an existing Kubernetes (k8s) cluster. By following these directions, you -will use Netdata's [Helm chart](https://github.com/netdata/helmchart) to create a Kubernetes monitoring deployment on -your cluster. - -The Helm chart installs one `parent` pod for storing metrics and managing alarm notifications, plus an additional +import Tabs from '@theme/Tabs'; +import TabItem from '@theme/TabItem'; + +# Install Netdata on Kubernetes + +This document details how to install Netdata on an existing Kubernetes (k8s) cluster, and connect it to Netdata Cloud. Read our [Kubernetes visualizations](https://github.com/netdata/netdata/blob/master/docs/cloud/visualize/kubernetes.md) documentation, to see what you will get. + +The [Netdata Helm chart](https://github.com/netdata/helmchart/blob/master/charts/netdata/README.md) installs one `parent` pod for storing metrics and managing alarm notifications, plus an additional `child` pod for every node in the cluster, responsible for collecting metrics from the node, Kubernetes control planes, pods/containers, and [supported application-specific metrics](https://github.com/netdata/helmchart#service-discovery-and-supported-services). +### Prerequisites + To deploy Kubernetes monitoring with Netdata, you need: -- A working cluster running Kubernetes v1.9 or newer. -- The [kubectl](https://kubernetes.io/docs/reference/kubectl/overview/) command line tool, within [one minor version +- A working cluster running Kubernetes v1.9 or newer. +- The [kubectl](https://kubernetes.io/docs/reference/kubectl/overview/) command line tool, within [one minor version difference](https://kubernetes.io/docs/tasks/tools/install-kubectl/#before-you-begin) of your cluster, on an administrative system. -- The [Helm package manager](https://helm.sh/) v3.0.0 or newer on the same administrative system. +- The [Helm package manager](https://helm.sh/) v3.0.0 or newer on the same administrative system. +- A Netdata Cloud account with a Space to connect the cluster to. -## Install the Netdata Helm chart +## Deploy Netdata on your Kubernetes Cluster -We recommend you install the Helm chart using our Helm repository. In the `helm install` command, replace `netdata` with -the release name of your choice. +First, you need to add the Netdata helm repository, and then install Netdata. +The installation process securely connects your Kubernetes cluster to stream metrics data to Netdata Cloud, enabling Kubernetes-specific visualizations like the health map and time-series composite charts. -```bash -helm repo add netdata https://netdata.github.io/helmchart/ -helm install netdata netdata/netdata -``` +<Tabs groupId="installation_type"> +<TabItem value="new_installations" label="New Installations"> -Run `kubectl get services` and `kubectl get pods` to confirm that your cluster now runs a `netdata` service, one -parent pod, and multiple child pods. +<h3> Install Netdata via the <code>helm install</code> command </h3> -You've now installed Netdata on your Kubernetes cluster. Next, it's time to opt-in and enable the powerful Kubernetes -dashboards available in Netdata Cloud. +#### Steps -## Connect your Kubernetes cluster to Netdata Cloud +1. Add the Netdata Helm chart repository by running: -To start [Kubernetes monitoring](https://github.com/netdata/netdata/blob/master/docs/cloud/visualize/kubernetes.md), you must first -[connect](https://github.com/netdata/netdata/blob/master/claim/README.md) your Kubernetes cluster to [Netdata Cloud](https://app.netdata.cloud). The connection process securely -connects your Kubernetes cluster to stream metrics data to Netdata Cloud, enabling Kubernetes-specific visualizations -like the health map and time-series composite charts. + ```bash + helm repo add netdata https://netdata.github.io/helmchart/ + ``` -### New installations +2. To install Netdata using the `helm install` command, run: -First, find the script to run an `helm install` command. You can get it by clicking on your Space's dropdown, then **Manage your Space**. -Click the **Nodes** tab and select the environment your node is running, in this case **kubernetes**, to reveal the script for your Space in Netdata Cloud. You need the `TOKEN` -and `ROOM` values. + ```bash + helm install netdata netdata/netdata + ``` -The script should be similar to: + > ### Note + > + > If you plan to connect the node to Netdata Cloud, you can find the command with the right parameters by clicking the "Add Nodes" button in your Space's Nodes tab. -```bash -helm install netdata netdata/netdata --set parent.claiming.enabled="true" --set parent.claiming.token="TOKEN" --set parent.claiming.rooms="ROOM" --set child.claiming.enabled=true --set child.claiming.token="TOKEN" --set child.claiming.rooms="ROOM" -``` + For more installation options, please read our [Netdata Helm chart for Kubernetes](https://github.com/netdata/helmchart/blob/master/charts/netdata/README.md) reference. -### Existing installations +#### Expected Result -On an existing installation, you will need to override the configuration values by running the `helm upgrade` command and provide a file with the values to override. You can start with creating a file called `override.yml`. +Run `kubectl get services` and `kubectl get pods` to confirm that your cluster now runs a `netdata` service, one parent pod, and multiple child pods. -```bash -touch override.yml -``` +</TabItem> +<TabItem value="existing_installations" label="Existing Installations"> -Paste the following into your `override.yml` file, replacing instances of `ROOM` and `TOKEN` with those from the script from Netdata Cloud. These settings connect your `parent`/`child` nodes to Netdata Cloud and store more -metrics in the nodes' time-series databases. - -```yaml -parent: - claiming: - enabled: true - token: "TOKEN" - rooms: "ROOM" - -child: - claiming: - enabled: true - token: "TOKEN" - rooms: "ROOM" - configs: - netdata: - data: | - [global] - memory mode = ram - history = 3600 - [health] - enabled = no -``` +<h3> Connect an existing Netdata installation to Netdata Cloud </h3> -> ❗ These override settings, along with the Helm chart's defaults, will retain an hour's worth of metrics (`history = -> 3600`, or `3600 seconds`) on each child node. Based on your metrics retention needs, and the resources available on -> your cluster, you may want to increase the `history` setting. +On an existing installation, in order to connect it to Netdata Cloud you will need to override the configuration values by running the `helm upgrade` command and provide a file with the values to override. -Apply these new settings: +#### Steps -```bash -helm upgrade -f override.yml netdata netdata/netdata -``` +1. You can start with creating a file called `override.yml` -The cluster terminates the old pods and creates new ones with the proper persistence and connection configuration. You'll -see your nodes, containers, and pods appear in Netdata Cloud in a few seconds. + ```bash + touch override.yml + ``` + +2. Paste the following into your `override.yml` file. + + ```yaml + parent: + claiming: + enabled: true + token: YOUR_CLAIM_TOKEN + rooms: YOUR_ROOM_ID_A,YOUR_ROOM_ID_B + + child: + claiming: + enabled: true + token: YOUR_CLAIM_TOKEN + rooms: YOUR_ROOM_ID_A,YOUR_ROOM_ID_B + configs: + netdata: + data: | + [global] + memory mode = ram + history = 3600 + [health] + enabled = no + ``` + + > :bookmark_tabs: Note + > + > Make sure to replace `YOUR_CLAIM_TOKEN` with the claim token of your space, + > and `YOUR_ROOM_ID` with the ID of the room you are willing to connect to. + + These settings connect your `parent`/`child` nodes to Netdata Cloud and store more metrics in the nodes' time-series databases. + + > :bookmark_tabs: Info + > + > These override settings, along with the Helm chart's defaults, will retain an hour's worth of metrics (`history = 3600`, or `3600 seconds`) on each child node. Based on your metrics retention needs, and the resources available on your cluster, you may want to increase the `history` setting. + +3. To apply these new settings, run: + + ```bash + helm upgrade -f override.yml netdata netdata/netdata + ``` + +#### Expected Result + +The cluster terminates the old pods and creates new ones with the proper persistence and connection configuration. You'll see your nodes, containers, and pods appear in Netdata Cloud in a few seconds. + +</TabItem> +</Tabs> 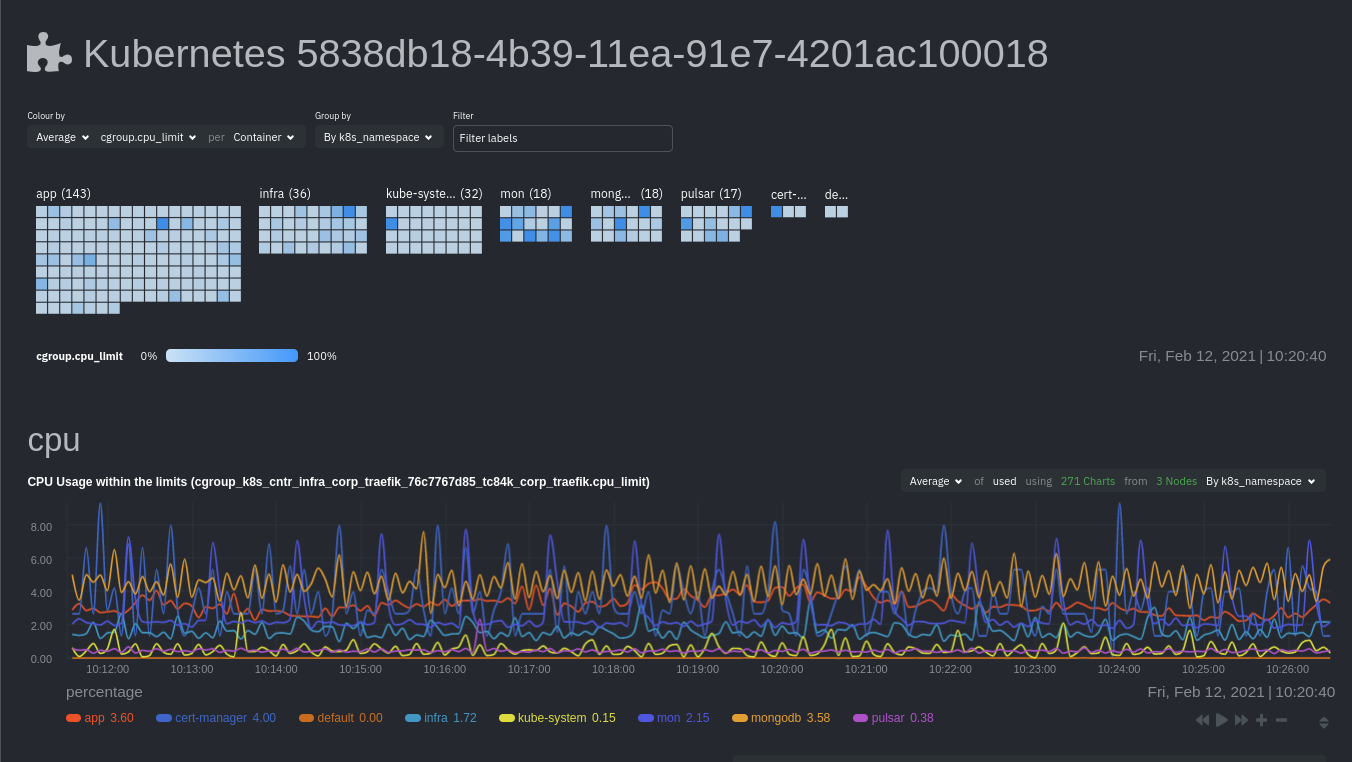 @@ -119,8 +129,7 @@ in Netdata, in addition to more guides and resources. Read up on the various configuration options in the [Helm chart documentation](https://github.com/netdata/helmchart#configuration) if you need to tweak your Kubernetes monitoring. -Your first option is to create an `override.yml` file, if you haven't created one already for -[connect](#connect-your-kubernetes-cluster-to-netdata-cloud), then apply the new configuration to your cluster with `helm +Your first option is to create an `override.yml` file, if you haven't created one already upon [deploying](#deploy-netdata-on-your-kubernetes-cluster), then apply the new configuration to your cluster with `helm upgrade`. ```bash @@ -140,8 +149,7 @@ Netdata's [service discovery](https://github.com/netdata/agent-service-discovery of the Helm chart installation, finds what services are running in a cluster's containers and automatically collects service-level metrics from them. -Service discovery supports [popular applications](https://github.com/netdata/helmchart#applications) and [Prometheus -endpoints](https://github.com/netdata/helmchart#prometheus-endpoints). +Service discovery supports [popular applications](https://github.com/netdata/helmchart#applications) and [Prometheus endpoints](https://github.com/netdata/helmchart#prometheus-endpoints). If your cluster runs services on non-default ports or uses non-default names, you may need to configure service discovery to start collecting metrics from your services. You have to edit the default ConfigMap that is shipped with @@ -153,8 +161,7 @@ First, copy the default file to your administrative system. curl https://raw.githubusercontent.com/netdata/helmchart/master/charts/netdata/sdconfig/child.yml -o child.yml ``` -Edit the new `child.yml` file according to your needs. See the [Helm chart -configuration](https://github.com/netdata/helmchart#configuration) and the file itself for details. +Edit the new `child.yml` file according to your needs. See the [Helm chart configuration](https://github.com/netdata/helmchart#configuration) and the file itself for details. You can then run `helm upgrade` with the `--set-file` argument to use your configured `child.yml` file instead of the default, changing the path if you copied it elsewhere. @@ -184,18 +191,10 @@ helm upgrade netdata netdata/netdata ## What's next? -[Start Kubernetes monitoring](https://github.com/netdata/netdata/blob/master/docs/cloud/visualize/kubernetes.md) in Netdata Cloud, which -comes with meaningful visualizations out of the box. - -Read our guide, [_Kubernetes monitoring with Netdata: Overview and -visualizations_](https://github.com/netdata/netdata/blob/master/docs/guides/monitor/kubernetes-k8s-netdata.md), for a complete walkthrough of Netdata's Kubernetes -monitoring capabilities, including a health map of every container in your infrastructure, aggregated resource -utilization metrics, and application metrics. +[Start Kubernetes monitoring](https://github.com/netdata/netdata/blob/master/docs/cloud/visualize/kubernetes.md) in Netdata Cloud, which comes with meaningful visualizations out of the box. ### Related reference documentation - [Netdata Cloud · Kubernetes monitoring](https://github.com/netdata/netdata/blob/master/docs/cloud/visualize/kubernetes.md) - [Netdata Helm chart](https://github.com/netdata/helmchart) - [Netdata service discovery](https://github.com/netdata/agent-service-discovery/) - - diff --git a/packaging/installer/methods/macos.md b/packaging/installer/methods/macos.md index f80f4c137..11884f7d7 100644 --- a/packaging/installer/methods/macos.md +++ b/packaging/installer/methods/macos.md @@ -1,10 +1,9 @@ <!-- title: "Install Netdata on macOS" custom_edit_url: "https://github.com/netdata/netdata/edit/master/packaging/installer/methods/macos.md" -sidebar_label: "Install Netdata on macOS" +sidebar_label: "macOS" learn_status: "Published" -learn_topic_type: "Tasks" -learn_rel_path: "Installation" +learn_rel_path: "Installation/Install on specific environments" --> # Install Netdata on macOS @@ -35,13 +34,11 @@ curl https://my-netdata.io/kickstart.sh > /tmp/netdata-kickstart.sh && sh /tmp/n The Netdata Agent is installed under `/usr/local/netdata`. Dependencies are handled via Homebrew. **Automatically connect to Netdata Cloud during installation** -<!-- Potential reuse: https://learn.netdata.cloud/docs/agent/claim#connect-an-agent-running-in-macos--> -<!--Potential reuse https://learn.netdata.cloud/docs/agent/packaging/installer/methods/kickstart#connect-node-to-netdata-cloud-during-installation The following information is copied from this link.--> The `kickstart.sh` script accepts additional parameters to automatically [connect](https://github.com/netdata/netdata/blob/master/claim/README.md) your node to Netdata Cloud immediately after installation. Find the `token` and `rooms` strings by [signing in to Netdata Cloud](https://app.netdata.cloud/sign-in?cloudRoute=/spaces), then clicking on **Connect Nodes** in the [Spaces management -area](https://github.com/netdata/netdata/blob/master/docs/cloud/cloud.mdx#manage-spaces). +area](https://github.com/netdata/netdata/blob/master/docs/cloud/spaces.md). - `--claim-token`: Specify a unique claiming token associated with your Space in Netdata Cloud to be used to connect to the node after the install. @@ -81,7 +78,7 @@ We don't recommend installing Netdata from source on macOS, as it can be difficu ``` 2. Click **Install** on the Software Update popup window that appears. -3. Use the same terminal session to install some of Netdata's prerequisites using Homebrew. If you don't want to use [Netdata Cloud](https://github.com/netdata/netdata/blob/master/docs/cloud/cloud.mdx), you can omit `cmake`. +3. Use the same terminal session to install some of Netdata's prerequisites using Homebrew. If you don't want to use [Netdata Cloud](https://github.com/netdata/netdata/blob/master/docs/quickstart/infrastructure.md), you can omit `cmake`. ```bash brew install ossp-uuid autoconf automake pkg-config libuv lz4 json-c openssl libtool cmake @@ -103,13 +100,3 @@ We don't recommend installing Netdata from source on macOS, as it can be difficu > Your Netdata configuration directory will be at `/usr/local/netdata/`. > Your stock configuration directory will be at `/usr/local/lib/netdata/conf.d/`. > The installer will also install a startup plist to start Netdata when your macOS system boots. - -## What's next? - -When you're finished with installation, check out our [single-node](https://github.com/netdata/netdata/blob/master/docs/quickstart/single-node.md) or -[infrastructure](https://github.com/netdata/netdata/blob/master/docs/quickstart/infrastructure.md) monitoring quickstart guides based on your use case. - -Or, skip straight to [configuring the Netdata Agent](https://github.com/netdata/netdata/blob/master/docs/configure/nodes.md). - - - diff --git a/packaging/installer/methods/manual.md b/packaging/installer/methods/manual.md index 46bc9a33f..9910f7f9a 100644 --- a/packaging/installer/methods/manual.md +++ b/packaging/installer/methods/manual.md @@ -2,10 +2,10 @@ title: "Install Netdata on Linux from a Git checkout" description: "Use the Netdata Agent source code from GitHub, plus helper scripts to set up your system, to install Netdata without packages or binaries." custom_edit_url: "https://github.com/netdata/netdata/edit/master/packaging/installer/methods/manual.md" -sidebar_label: "Install Netdata on Linux from a Git checkout" +sidebar_label: "From a Git checkout" learn_status: "Published" -learn_topic_type: "Tasks" -learn_rel_path: "Installation" +learn_rel_path: "Installation/Installation methods" +sidebar_position: 30 --> # Install Netdata on Linux from a Git checkout @@ -226,16 +226,3 @@ Our current build process unfortunately has some issues when using certain confi If the installation fails with errors like `/bin/ld: externaldeps/libwebsockets/libwebsockets.a(context.c.o): relocation R_X86_64_32 against '.rodata.str1.1' can not be used when making a PIE object; recompile with -fPIC`, and you are trying to build with `clang` on Linux, you will need to build Netdata using GCC to get a fully functional install. In most cases, you can do this by running `CC=gcc ./netdata-installer.sh`. - -## What's next? - -When you're finished with installation, check out our [single-node](https://github.com/netdata/netdata/blob/master/docs/quickstart/single-node.md) or -[infrastructure](https://github.com/netdata/netdata/blob/master/docs/quickstart/infrastructure.md) monitoring quickstart guides based on your use case. - -Or, skip straight to [configuring the Netdata Agent](https://github.com/netdata/netdata/blob/master/docs/configure/nodes.md). - -Read through Netdata's [documentation](https://learn.netdata.cloud/docs), which is structured based on actions and -solutions, to enable features like health monitoring, alarm notifications, long-term metrics storage, exporting to -external databases, and more. - - diff --git a/packaging/installer/methods/methods.md b/packaging/installer/methods/methods.md new file mode 100644 index 000000000..f9ca2253e --- /dev/null +++ b/packaging/installer/methods/methods.md @@ -0,0 +1,26 @@ +<!-- +title: "Installation methods" +description: "Netdata can be installed as a DEB/RPM package, a static binary, a docker container or from source" +custom_edit_url: https://github.com/netdata/netdata/edit/master/packaging/installer/methods/methods.md +sidebar_label: "Installation methods" +learn_status: "Published" +learn_rel_path: "Installation/Installation methods" +sidebar_position: 30 +--> + +# Installation methods + +Netdata can be installed: + +- [As a DEB/RPM package](https://github.com/netdata/netdata/blob/master/packaging/installer/methods/packages.md) +- [As a static binary](https://github.com/netdata/netdata/blob/master/packaging/makeself/README.md) +- [From a git checkout](https://github.com/netdata/netdata/blob/master/packaging/installer/methods/manual.md) +- [As a docker container](https://github.com/netdata/netdata/blob/master/packaging/docker/README.md) + +The [one line installer kickstart.sh](https://github.com/netdata/netdata/blob/master/packaging/installer/methods/kickstart.md) +picks the most appropriate method out of the first three for any system +and is the recommended installation method, if you don't use containers. + +`kickstart.sh` can also be used for +[offline installation](https://github.com/netdata/netdata/blob/master/packaging/installer/methods/offline.md), +suitable for air-gapped systems. diff --git a/packaging/installer/methods/offline.md b/packaging/installer/methods/offline.md index e49f1d2e5..f2b6cc415 100644 --- a/packaging/installer/methods/offline.md +++ b/packaging/installer/methods/offline.md @@ -2,15 +2,15 @@ title: "Install Netdata on offline systems" description: "Install the Netdata Agent on offline/air gapped systems to benefit from real-time, per-second monitoring without connecting to the internet." custom_edit_url: "https://github.com/netdata/netdata/edit/master/packaging/installer/methods/offline.md" -sidebar_label: "Install Netdata on offline systems" +sidebar_label: "Offline systems" learn_status: "Published" -learn_topic_type: "Tasks" -learn_rel_path: "Installation" +learn_rel_path: "Installation/Installation methods" +sidebar_position: 50 --> # Install Netdata on offline systems -Our kickstart install script provides support for installing the Netdata Agent on systems which do not have a +Our kickstart install script provides support for installing the Netdata Agent on air-gapped systems which do not have a usable internet connection by prefetching all of the required files so that they can be copied to the target system. Currently, we only support using static installs with this method. There are tentative plans to support building locally on offline systems as well, but there is currently no estimate of when this functionality may be implemented. @@ -57,14 +57,3 @@ offline install source directory. It accepts all the [same options as the kickst script](https://github.com/netdata/netdata/blob/master/packaging/installer/methods/kickstart.md#optional-parameters-to-alter-your-installation) for further customization of the installation, though it will default to not enabling automatic updates (as they are not supported on offline installs). - -## What's next? - -When you're finished with installation, check out our [single-node](https://github.com/netdata/netdata/blob/master/docs/quickstart/single-node.md) or -[infrastructure](https://github.com/netdata/netdata/blob/master/docs/quickstart/infrastructure.md) monitoring quickstart guides based on your use case. - -Or, skip straight to [configuring the Netdata Agent](https://github.com/netdata/netdata/blob/master/docs/configure/nodes.md). - -Read through Netdata's [documentation](https://learn.netdata.cloud/docs), which is structured based on actions and -solutions, to enable features like health monitoring, alarm notifications, long-term metrics storage, exporting to -external databases, and more. diff --git a/packaging/installer/methods/packages.md b/packaging/installer/methods/packages.md index 135512808..1b6870467 100644 --- a/packaging/installer/methods/packages.md +++ b/packaging/installer/methods/packages.md @@ -2,13 +2,13 @@ title: "Install Netdata using native DEB/RPM packages." description: "Instructions for how to install Netdata using native DEB or RPM packages." custom_edit_url: "https://github.com/netdata/netdata/edit/master/packaging/installer/methods/packages.md" -sidebar_label: "Install Netdata using native DEB/RPM packages." +sidebar_label: "Native DEB/RPM packages" learn_status: "Published" -learn_topic_type: "Tasks" -learn_rel_path: "Installation" +learn_rel_path: "Installation/Installation methods" +sidebar_position: 20 --> -# Installing Netdata using native DEB or RPM packages. +# Install Netdata using native DEB/RPM packages. For most common Linux distributions that use either DEB or RPM packages, Netdata provides pre-built native packages for current releases in-line with @@ -41,7 +41,7 @@ Under each of those directories is a directory for each supported release of tha directory for each supported CPU architecture which contains the actual repository. For example, for stable release packages for RHEL 9 on 64-bit x86, the full URL for the repository would be -https://repo.netdata.cloud/repos/stable/el/9/x86\_64/ +https://repo.netdata.cloud/repos/stable/el/9/x86_64/ Our RPM packages and repository metadata are signed using a GPG key with a user name of ‘Netdatabot’. The current key fingerprint is `6588FDD7B14721FE7C3115E6F9177B5265F56346`. The associated public key can be fetched from diff --git a/packaging/installer/methods/pfsense.md b/packaging/installer/methods/pfsense.md index e0556629c..1a03afb57 100644 --- a/packaging/installer/methods/pfsense.md +++ b/packaging/installer/methods/pfsense.md @@ -2,6 +2,9 @@ title: "Install Netdata on pfSense" description: "Install Netdata on pfSense to monitor the health and performance of firewalls with thousands of real-time, per-second metrics." custom_edit_url: https://github.com/netdata/netdata/edit/master/packaging/installer/methods/pfsense.md +sidebar_label: "pfSense" +learn_status: "Published" +learn_rel_path: "Installation/Install on specific environments" --> # Install Netdata on pfSense diff --git a/packaging/installer/methods/source.md b/packaging/installer/methods/source.md index ecf35382a..7b6b88d4b 100644 --- a/packaging/installer/methods/source.md +++ b/packaging/installer/methods/source.md @@ -4,8 +4,8 @@ description: "Package maintainers and power users may be interested in manually custom_edit_url: "https://github.com/netdata/netdata/edit/master/packaging/installer/methods/source.md" sidebar_label: "Manually build Netdata from source" learn_status: "Published" -learn_topic_type: "Tasks" -learn_rel_path: "Installation" +learn_rel_path: "Installation/Package maintainers" +sidebar_position: 100 --> # Manually build Netdata from source @@ -233,7 +233,7 @@ using glibc or musl. To use one of these: Alternatively, you may wish to build the eBPF code locally yourself. For instructions, please consult [the README file for our kernel-collector -repository](https://github.com/netdata/kernel-collector/blob/master/README.md), +repository](https://github.com/netdata/kernel-collector/#readme), which outlines both the required dependencies, as well as multiple options for building the code. diff --git a/packaging/installer/methods/synology.md b/packaging/installer/methods/synology.md index e3602df5e..3910859b4 100644 --- a/packaging/installer/methods/synology.md +++ b/packaging/installer/methods/synology.md @@ -2,6 +2,9 @@ title: "Install Netdata on Synology" description: "The Netdata Agent can be installed on AMD64-compatible NAS systems using the 64-bit pre-compiled static binary." custom_edit_url: https://github.com/netdata/netdata/edit/master/packaging/installer/methods/synology.md +sidebar_label: "Synology" +learn_status: "Published" +learn_rel_path: "Installation/Install on specific environments" --> # Install Netdata on Synology @@ -14,7 +17,9 @@ custom_edit_url: https://github.com/netdata/netdata/edit/master/packaging/instal > with your recommended improvements or changes. Thank you! -The good news is that our [one-line installation script](kickstart.md) works fine if your NAS is one that uses the amd64 architecture. It +The good news is that our +[one-line installation script](https://github.com/netdata/netdata/blob/master/packaging/installer/methods/kickstart.md) +works fine if your NAS is one that uses the amd64 architecture. It will install the content into `/opt/netdata`, making future removal safe and simple. ## Run as netdata user @@ -25,8 +30,8 @@ installations run it as the `netdata` user, you might wish to do the same. This 1. Create a group `netdata` via the Synology group interface. Give it no access to anything. 2. Create a user `netdata` via the Synology user interface. Give it no access to anything and a random password. Assign the user to the `netdata` group. Netdata will chuid to this user when running. -3. Change ownership of the following directories, as defined in [Netdata - Security](https://github.com/netdata/netdata/blob/master/docs/netdata-security.md#security-design): +3. Change ownership of the following directories, as defined in + [Netdata Security](https://github.com/netdata/netdata/blob/master/docs/netdata-security.md#security-design): ```sh chown -R root:netdata /opt/netdata/usr/share/netdata diff --git a/packaging/installer/methods/systems.md b/packaging/installer/methods/systems.md new file mode 100644 index 000000000..e53c4f4a0 --- /dev/null +++ b/packaging/installer/methods/systems.md @@ -0,0 +1,18 @@ +<!-- +title: "Install on specific environments" +description: "Netdata can be installed as a DEB/RPM package, a static binary, a docker container or from source" +custom_edit_url: https://github.com/netdata/netdata/edit/master/packaging/installer/methods/systems.md +sidebar_label: "Install on specific environments" +learn_status: "Published" +learn_rel_path: "Installation/Install on specific environments" +--> + +# Install on specific environments + +This category contains specific instructions for some popular environments. +If you have a standard environment that is not yet listed here, just use the +[one line installer kickstart.sh](https://github.com/netdata/netdata/blob/master/packaging/installer/methods/kickstart.md) + +If your environment is somewhat old or unusual, check our +[platform support policy](https://github.com/netdata/netdata/blob/master/packaging/PLATFORM_SUPPORT.md). + |