1
2
3
4
5
6
7
8
9
10
11
12
13
14
15
16
17
18
19
20
21
22
23
24
25
26
27
28
29
30
31
32
33
34
35
36
37
38
39
40
41
42
43
44
45
46
47
48
49
50
51
52
53
54
55
56
57
58
59
60
61
62
63
64
65
66
67
68
69
70
71
72
73
74
75
76
77
78
79
80
81
82
83
84
85
86
87
88
89
90
91
92
93
94
95
96
97
98
99
100
101
102
103
104
105
106
107
108
109
110
111
112
113
114
115
116
117
118
119
120
121
122
123
124
125
126
127
128
129
130
131
132
133
134
135
136
137
138
139
140
141
142
143
144
145
146
147
148
149
150
151
152
153
154
155
156
157
158
159
160
161
162
163
164
165
166
167
168
169
170
171
172
173
174
175
176
177
178
179
180
181
182
183
184
185
186
187
188
189
190
191
192
193
194
195
196
197
198
199
200
201
202
203
204
205
206
207
208
209
210
211
212
213
214
215
216
217
218
219
220
221
222
223
224
225
226
227
228
229
230
231
232
|
<!--
title: "Step 10. Set up a proxy"
custom_edit_url: https://github.com/netdata/netdata/edit/master/docs/guides/step-by-step/step-10.md
-->
# Step 10. Set up a proxy
You're almost through! At this point, you should be pretty familiar with now Netdata works and how to configure it to
your liking.
In this step of the guide, we're going to add a proxy in front of Netdata. We're doing this for both improved
performance and security, so we highly recommend following these steps. Doubly so if you installed Netdata on a
publicly-accessible remote server.
> ❗ If you installed Netdata on the machine you're currently using (e.g. on `localhost`), and have been accessing
> Netdata at `http://localhost:19999`, you can skip this step of the guide. In most cases, there is no benefit to
> setting up a proxy for a service running locally.
> ❗❗ This guide requires more advanced administration skills than previous parts. If you're still working on your
> Linux administration skills, and would rather get back to Netdata, you might want to [skip this
> step](step-99.md) for now and return to it later.
## What you'll learn in this step
In this step of the Netdata guide, you'll learn:
- [What a proxy is and the benefits of using one](#wait-whats-a-proxy)
- [How to connect Netdata to Nginx](#connect-netdata-to-nginx)
- [How to enable HTTPS in Nginx](#enable-https-in-nginx)
- [How to secure your Netdata dashboard with a password](#secure-your-netdata-dashboard-with-a-password)
Let's dive in!
## Wait. What's a proxy?
A proxy is a middleman between the internet and a service you're running on your system. Traffic from the internet at
large enters your system through the proxy, which then routes it to the service.
A proxy is often used to enable encrypted HTTPS connections with your browser, but they're also useful for load
balancing, performance, and password-protection.
We'll use [Nginx](https://nginx.org/en/) for this step of the guide, but you can also use
[Caddy](https://caddyserver.com/) as a simple proxy if you prefer.
## Required before you start
You need three things to run a proxy using Nginx:
- Nginx and Certbot installed on your system
- A fully qualified domain name
- A subdomain for Netdata that points to your system
### Nginx and Certbot
This step of the guide assumes you can install Nginx on your system. Here are the easiest methods to do so on Debian,
Ubuntu, Fedora, and CentOS systems.
```bash
sudo apt-get install nginx # Debian/Ubuntu
sudo dnf install nginx # Fedora
sudo yum install nginx # CentOS
```
Check out [Nginx's installation
instructions](https://docs.nginx.com/nginx/admin-guide/installing-nginx/installing-nginx-open-source/) for details on
other Linux distributions.
Certbot is a tool to help you create and renew certificate+key pairs for your domain. Visit their
[instructions](https://certbot.eff.org/instructions) to get a detailed installation process for your operating system.
### Fully qualified domain name
The only other true prerequisite of using a proxy is a **fully qualified domain name** (FQDN). In other words, a domain
name like `example.com`, `netdata.cloud`, or `github.com`.
If you don't have a domain name, you won't be able to use a proxy the way we'll describe here.
Because we strongly recommend running Netdata behind a proxy, the cost of a domain name is worth the benefit. If you
don't have a preferred domain registrar, try [Google Domains](https://domains.google/),
[Cloudflare](https://www.cloudflare.com/products/registrar/), or [Namecheap](https://www.namecheap.com/).
### Subdomain for Netdata
Any of the three domain registrars mentioned above, and most registrars in general, will allow you to create new DNS
entries for your domain.
To create a subdomain for Netdata, use your registrar's DNS settings to create an A record for a `netdata` subdomain.
Point the A record to the IP address of your system.
Once finished with the steps below, you'll be able to access your dashboard at `http://netdata.example.com`.
## Connect Netdata to Nginx
The first part of enabling the proxy is to create a new server for Nginx.
Use your favorite text editor to create a file at `/etc/nginx/sites-available/netdata`, copy in the following
configuration, and change the `server_name` line to match your domain.
```nginx
upstream backend {
server 127.0.0.1:19999;
keepalive 64;
}
server {
listen 80;
# uncomment the line if you want nginx to listen on IPv6 address
#listen [::]:80;
# Change `example.com` to match your domain name.
server_name netdata.example.com;
location / {
proxy_set_header X-Forwarded-Host $host;
proxy_set_header X-Forwarded-Server $host;
proxy_set_header X-Forwarded-For $proxy_add_x_forwarded_for;
proxy_pass http://backend;
proxy_http_version 1.1;
proxy_pass_request_headers on;
proxy_set_header Connection "keep-alive";
proxy_store off;
}
}
```
Save and close the file.
Test your configuration file by running `sudo nginx -t`.
If that returns no errors, it's time to make your server available. Run the command to create a symbolic link in the
`sites-enabled` directory.
```bash
sudo ln -s /etc/nginx/sites-available/netdata /etc/nginx/sites-enabled/netdata
```
Finally, restart Nginx to make your changes live. Open your browser and head to `http://netdata.example.com`. You should
see your proxied Netdata dashboard!
## Enable HTTPS in Nginx
All this proxying doesn't mean much if we can't take advantage of one of the biggest benefits: encrypted HTTPS
connections! Let's fix that.
Certbot will automatically get a certificate, edit your Nginx configuration, and get HTTPS running in a single step. Run
the following:
```bash
sudo certbot --nginx
```
> See this error after running `sudo certbot --nginx`?
>
> ```
> Saving debug log to /var/log/letsencrypt/letsencrypt.log
> The requested nginx plugin does not appear to be installed`
> ```
>
> You must install `python-certbot-nginx`. On Ubuntu or Debian systems, you can run `sudo apt-get install
> python-certbot-nginx` to download and install this package.
You'll be prompted with a few questions. At the `Which names would you like to activate HTTPS for?` question, hit
`Enter`. Next comes this question:
```bash
Please choose whether or not to redirect HTTP traffic to HTTPS, removing HTTP access.
- - - - - - - - - - - - - - - - - - - - - - - - - - - - - - - - - - - - - - - -
1: No redirect - Make no further changes to the webserver configuration.
2: Redirect - Make all requests redirect to secure HTTPS access. Choose this for
new sites, or if you're confident your site works on HTTPS. You can undo this
change by editing your web server's configuration.
- - - - - - - - - - - - - - - - - - - - - - - - - - - - - - - - - - - - - - - -
```
You _do_ want to force HTTPS, so hit `2` and then `Enter`. Nginx will now ensure all attempts to access
`netdata.example.com` use HTTPS.
Certbot will automatically renew your certificate whenever it's needed, so you're done configuring your proxy. Open your
browser again and navigate to `https://netdata.example.com`, and you'll land on an encrypted, proxied Netdata dashboard!
## Secure your Netdata dashboard with a password
Finally, let's take a moment to put your Netdata dashboard behind a password. This step is optional, but you might not
want _anyone_ to access the metrics in your proxied dashboard.
Run the below command after changing `user` to the username you want to use to log in to your dashboard.
```bash
sudo sh -c "echo -n 'user:' >> /etc/nginx/.htpasswd"
```
Then run this command to create a password:
```bash
sudo sh -c "openssl passwd -apr1 >> /etc/nginx/.htpasswd"
```
You'll be prompted to create a password. Next, open your Nginx configuration file at
`/etc/nginx/sites-available/netdata` and add these two lines under `location / {`:
```nginx
location / {
auth_basic "Restricted Content";
auth_basic_user_file /etc/nginx/.htpasswd;
...
```
Save, exit, and restart Nginx. Then try visiting your dashboard one last time. You'll see a prompt for the username and
password you just created.
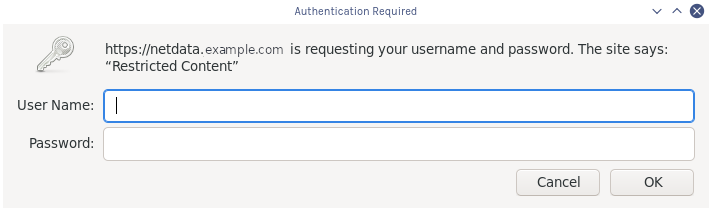
Your Netdata dashboard is now a touch more secure.
## What's next?
You're a real sysadmin now!
If you want to configure your Nginx proxy further, check out the following:
- [Running Netdata behind Nginx](https://github.com/netdata/netdata/blob/master/docs/Running-behind-nginx.md)
- [How to optimize Netdata's performance](https://github.com/netdata/netdata/blob/master/docs/guides/configure/performance.md)
- [Enabling TLS on Netdata's dashboard](https://github.com/netdata/netdata/blob/master/web/server/README.md#enabling-tls-support)
And... you're _almost_ done with the Netdata guide.
For some celebratory emoji and a clap on the back, head on over to our final step.
[Next: The end. →](step-99.md)
|
